

Upload Files to S3 Using API Gateway: A Step-by-Step Guide
Streamline Your AWS Workflow: Upload images to S3 with API Gateway


In this blog post, we'll dive into the process of setting up an API Gateway endpoint designed to upload JPEG images to an S3 bucket, utilizing a filename parameter as the S3 object key. This solution is designed for images up to 4MB in size, ensuring a streamlined and efficient approach to file storage on AWS.
For those who prefer a visual guide, I've recorded a video tutorial available on YouTube:
The unique aspect of this setup is the use of a filename parameter to name the S3 object, a crucial detail for organizing and retrieving stored images. With the premise that each image will not exceed 4MB, we explore two distinct solutions to achieve our objective.
Evaluating Potential Solutions
We consider two approaches:
Linking API Gateway to a Lambda Function: This method involves creating an API Gateway endpoint that triggers a Lambda function responsible for uploading the image to S3. This approach embodies the serverless architecture, with Lambda managing the file transfer based on the API Gateway's input.
Direct API Gateway to S3 Integration: Alternatively, we can configure API Gateway to interact directly with S3, bypassing the need for Lambda. This option is viable given the 10MB limit on API Gateway requests and our 4MB image constraint. It offers reduced latency and cost, making it an attractive solution when image processing tasks are not required.
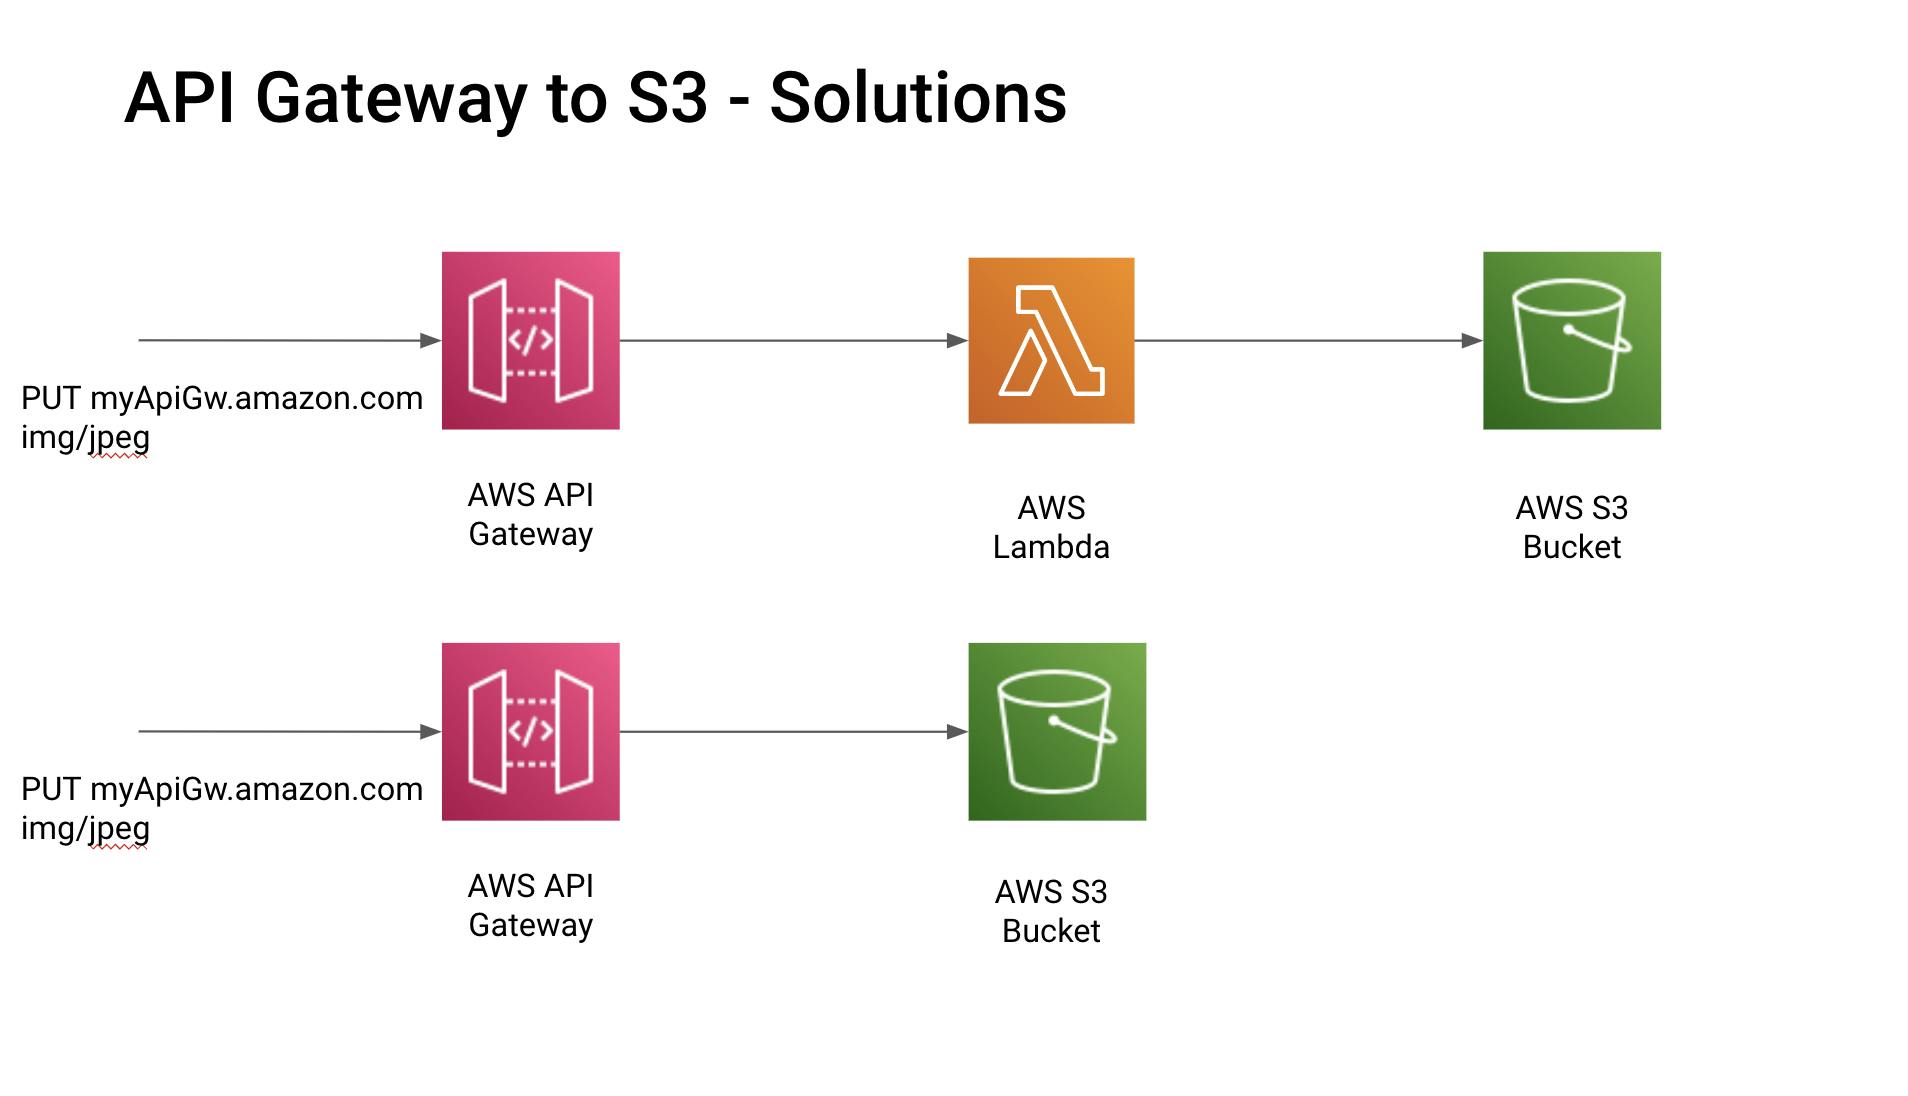
Based on the requirements, I've decided to opt for the second approach as it's the most cost-efficient.
Setting Up IAM Roles and Policies
First, we create a new IAM role and policy that grants the API Gateway the necessary permissions to upload objects to our S3 bucket. This step emphasizes the principle of least privilege, ensuring the API Gateway has no more access than necessary.
The policy looks something like this:
{
  "Version": "2012-10-17",
  "Statement": [
    {
      "Effect": "Allow",
      "Action": "s3:PutObject",
      "Resource": "arn:aws:s3:::YourBucketName/*"
    }
  ]
}
After defining the policy, we attach it to our newly created IAM role, empowering our API Gateway to interact with the specified S3 bucket.
We proceed to create a REST API in the AWS console, naming it appropriately and selecting 'regional' as the endpoint type. The API setup includes defining resources and methods that outline the path for uploading files:
/bucket/{bucketName}/filename/{fileName}

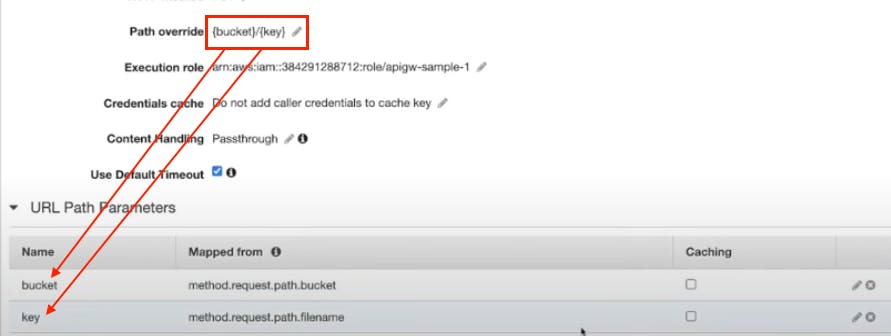
In the integration settings, the integration type is set to AWS Service (S3), with the action as PUT. Then, we use the path override feature to set the bucket name and object key,{bucket}/{key}.
To ensure the API Gateway can handle JPEG images, we declare the expected binary content type as image/jpeg. This configuration is crucial for the seamless transfer of images through the API.
Deployment and Testing
With the configuration complete, we deploy the API to a 'dev' stage, obtaining an invoke URL. This URL serves as the gateway for uploading images to the S3 bucket.
Testing the setup with Postman or a similar tool involves sending a PUT request to the invoke URL, including the bucket name and object key in the URL path. A successful upload is confirmed by a 200 OK response and the presence of the image in the S3 bucket.
Conclusion
This guide outlines a practical approach to creating a serverless file upload solution using AWS API Gateway and S3. By directly linking API Gateway to S3, we achieve a minimalistic and efficient upload mechanism, eliminating the need for intermediary Lambda functions. This method not only simplifies the architecture but also reduces operational costs and latency, making it an excellent addition to your AWS toolkit.