When building on AWS, it won't be long before you need to put some resources within a VPC. This of course depends if you are working for a startup all in on serverless or an enterprise with lots office office-based users.
Either way, If you are delving into networking in AWS you are likely going to be dealing with VPCs.
Let’s dig in 👍
What Is an AWS VPC?
A VPC is a logically isolated network where you can place your resources. It's similar to a physical Data Center; however, as it is logically defined and not bricks and mortar we can have one or many, and they can be big or small.
They can be isolated, connected, have a path out to the internet, or connected to your offices. They are a fundamental building block in AWS.
To get us started, we will need to touch on some networking basics.
Understanding the Basics of Virtual Networking
CIDR Blocks
Every VPC will have at least one CIDR block, which stands for Classless Inter-Domain Routing block.
NOTE: For more history on this I would suggest checking out Wikipedia.
CIDR blocks are a way to organize and divide up the address space allocated to our VPC.
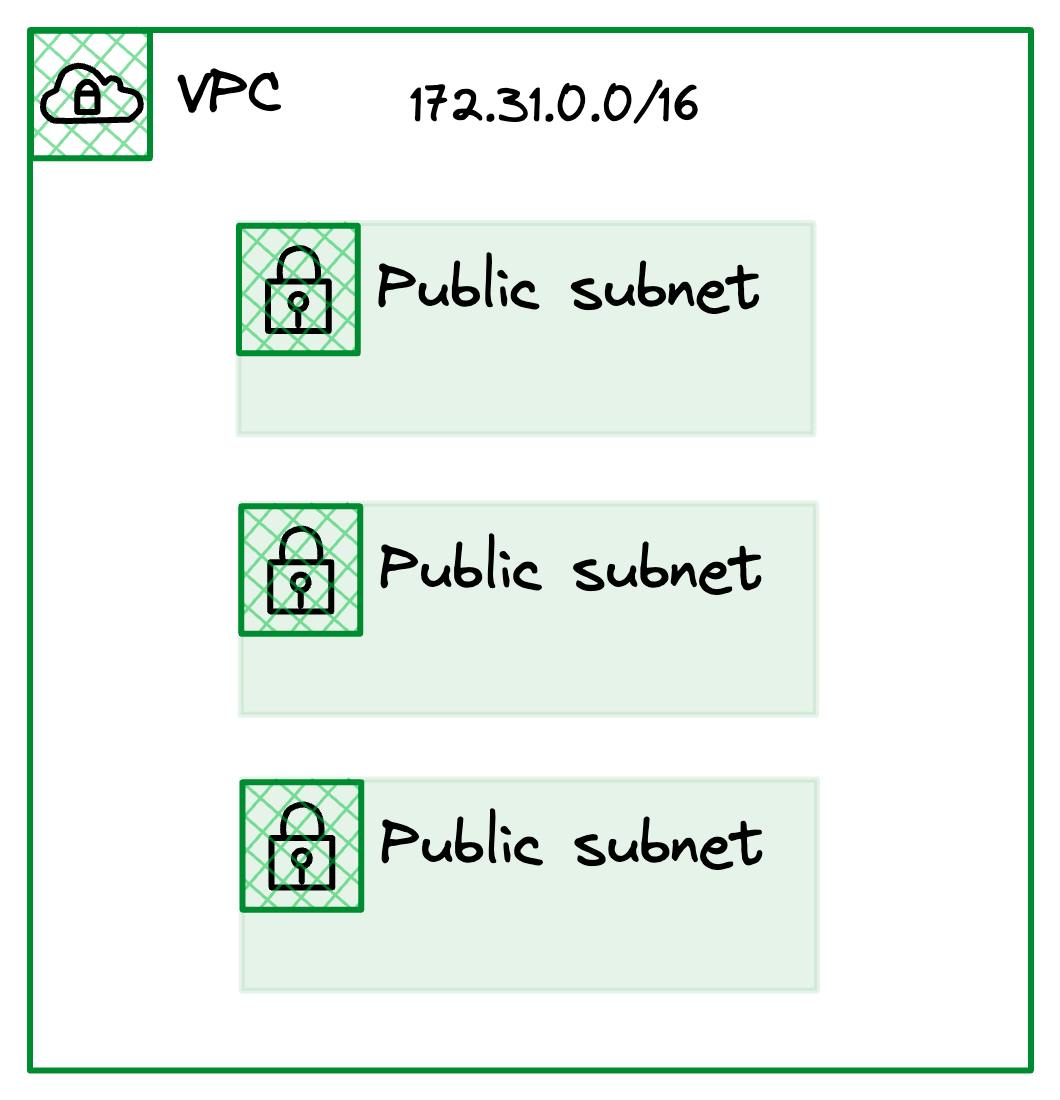
The default AWS VPC that's available in every region per account has the 172.31.0.0/16 CIDR block assigned.
This CIDR block is then split further to make our virtual networks into nice pieces called subnets.
Subnets
An AWS subnet is essentially a subsection within a VPC, with a CIDR block carved from our larger CIDR block assigned at the VPC.
Subnets are assigned to an AWS Availability Zone when they are created, and that can’t be changed without recreating the subnet. This is something fairly unique to AWS when compared to other public cloud providers.
The following shows you the default VPCs subnet configuration.
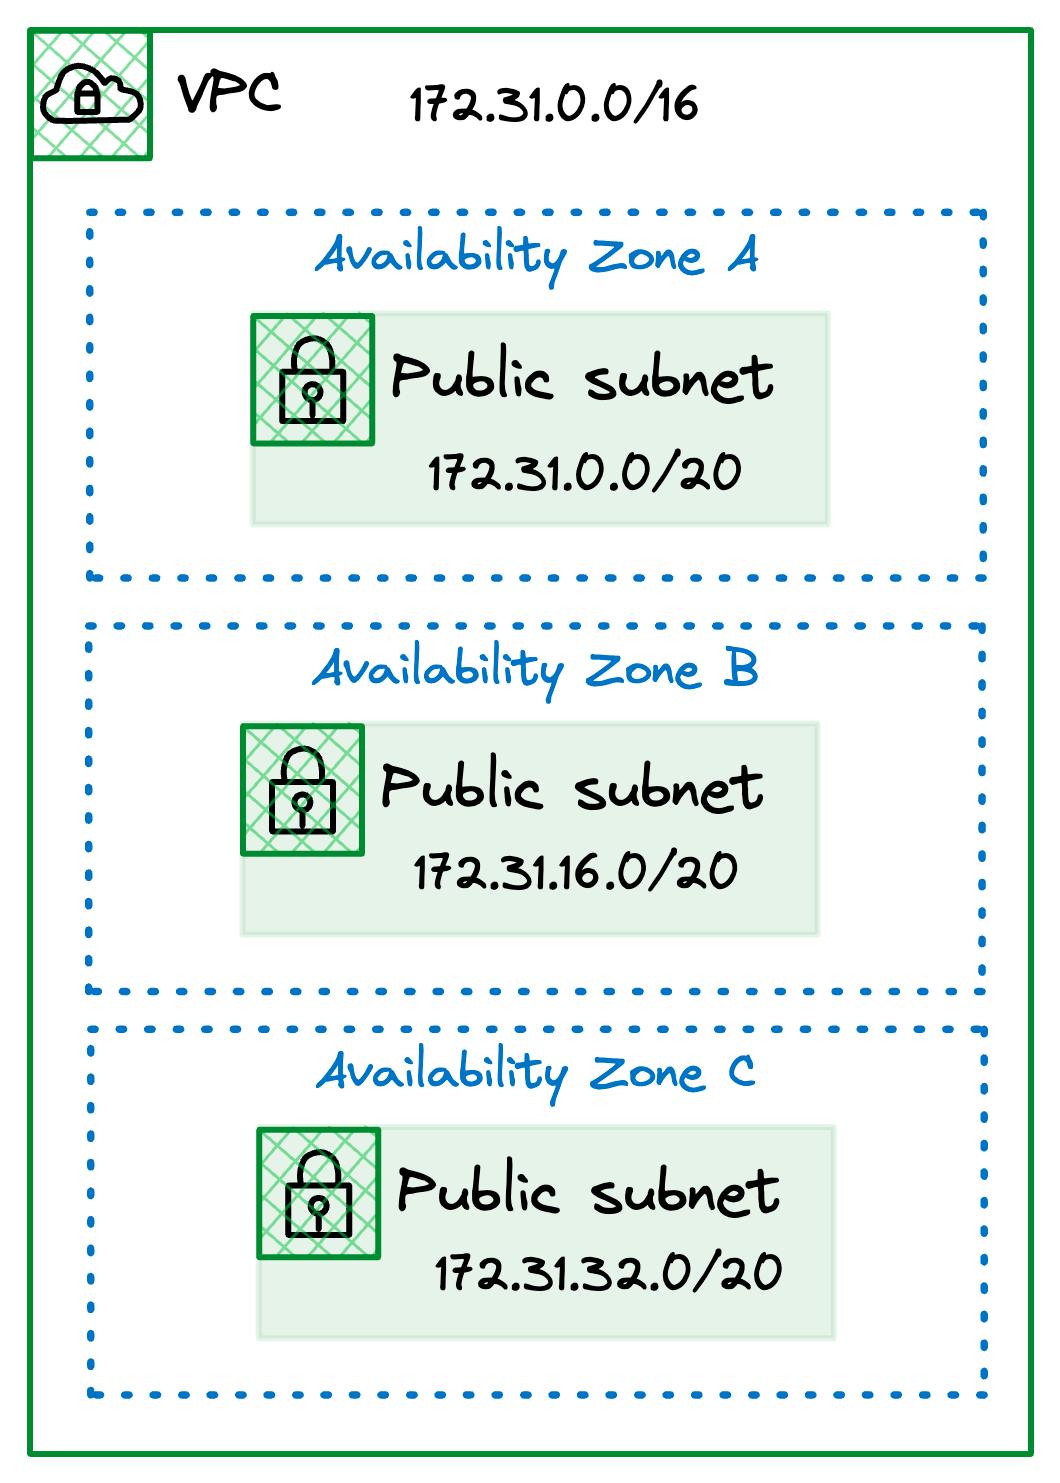
Subnets allow you to partition your network layout within a VPC into smaller segments so you can organize, manage, and secure your resources efficiently.
For example, you could have multiple subnets across all availability zones for your web servers that are accessible to the public however another set for your databases that are private and not accessible from the internet, all adding a layer of security and defense in depth.
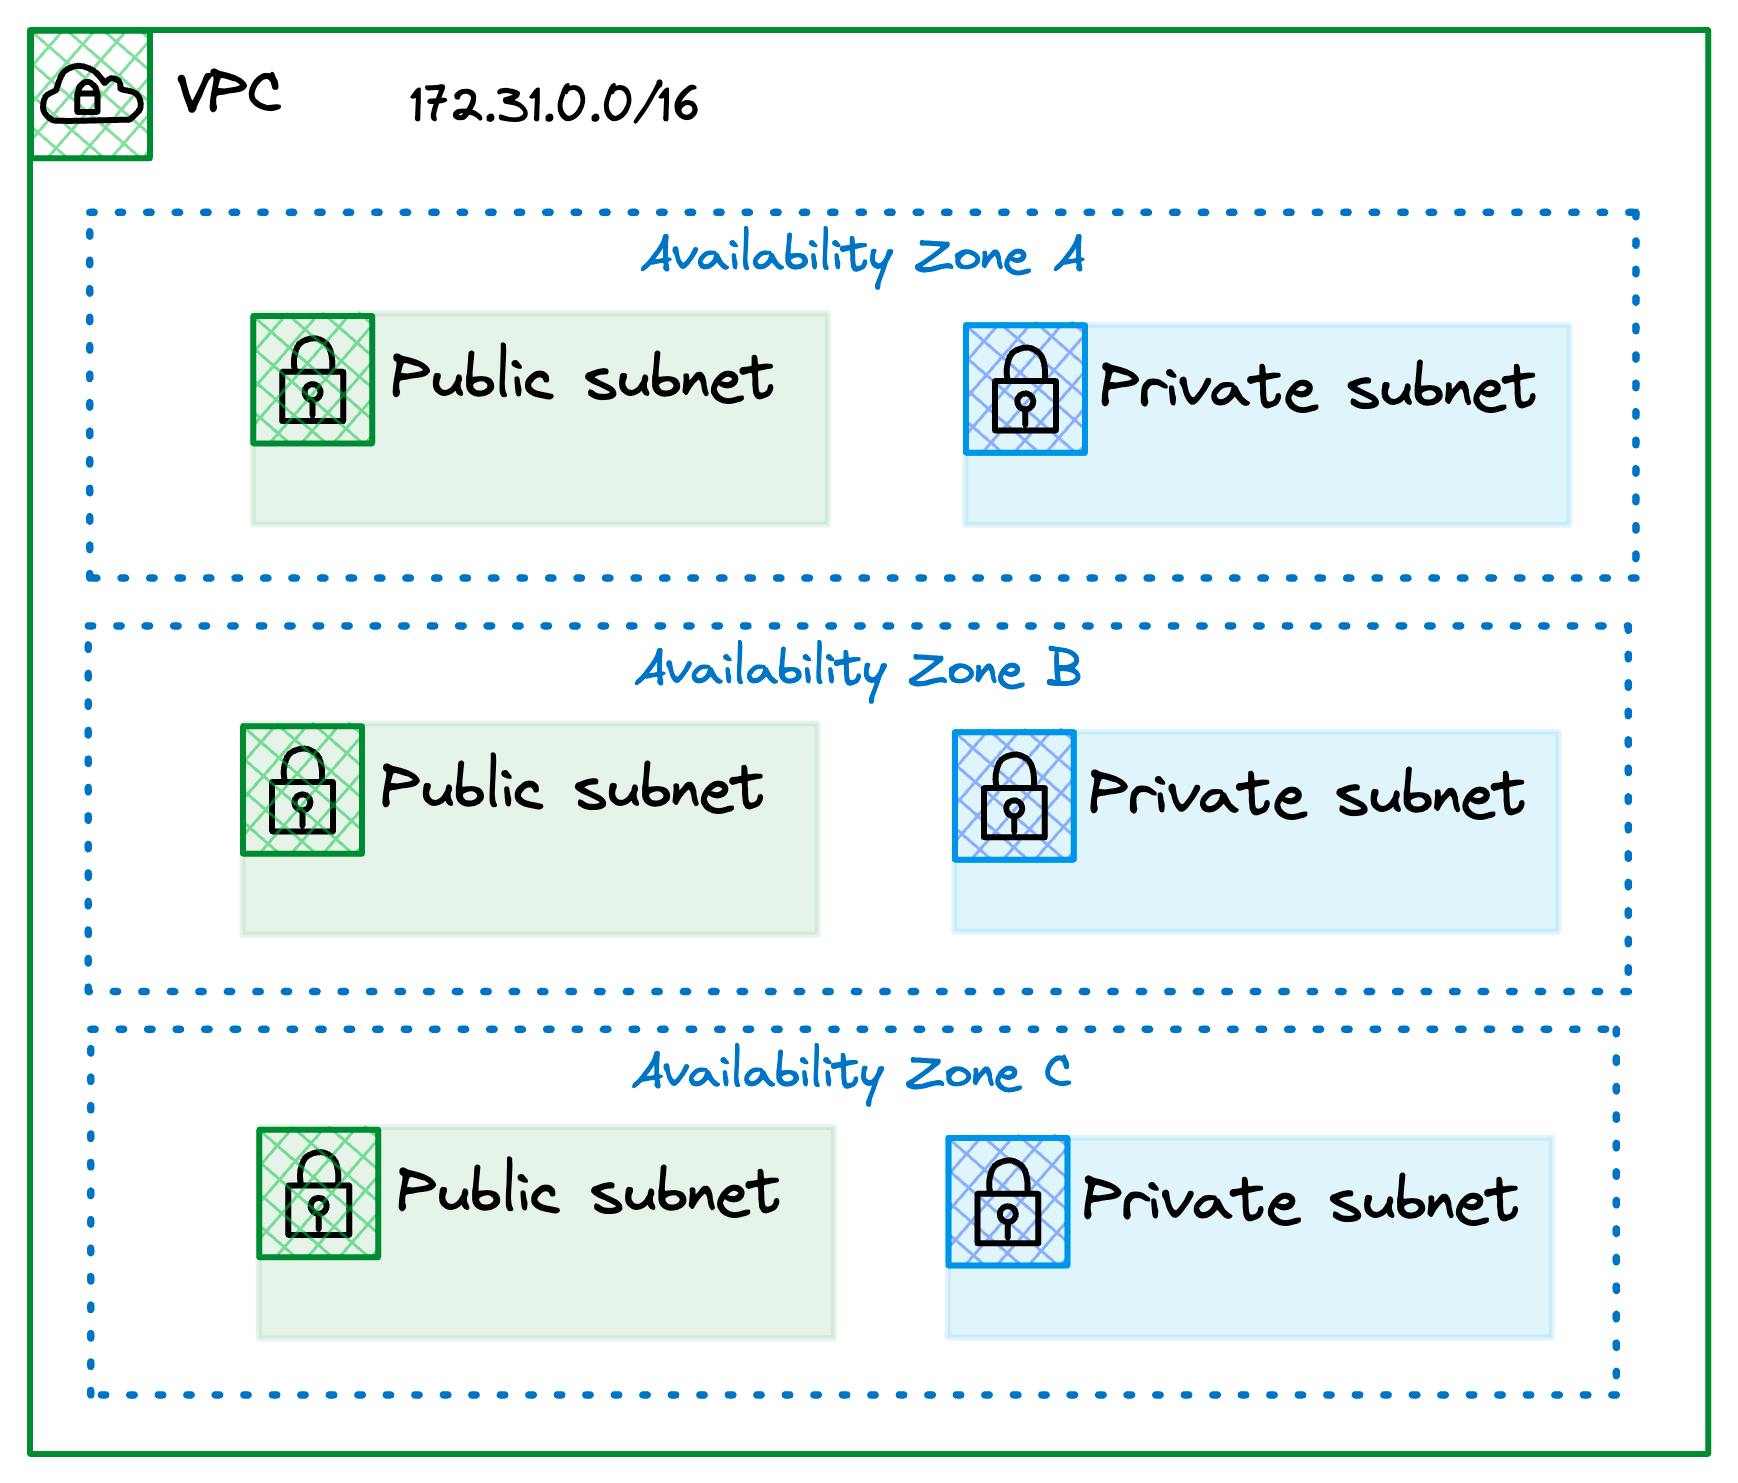
As always there are many options however you can use these building blocks when architecting your VPC subnets so you can control traffic between the different parts of your cloud environment, keeping things organized and safeguarded.
Security Groups
A security group lets us control the traffic allowed in (ingress) and out (egress) for the associated resources. Think of it as a mini firewall access list we can wrap around our resources to control what they can talk to, but also what can talk to them.
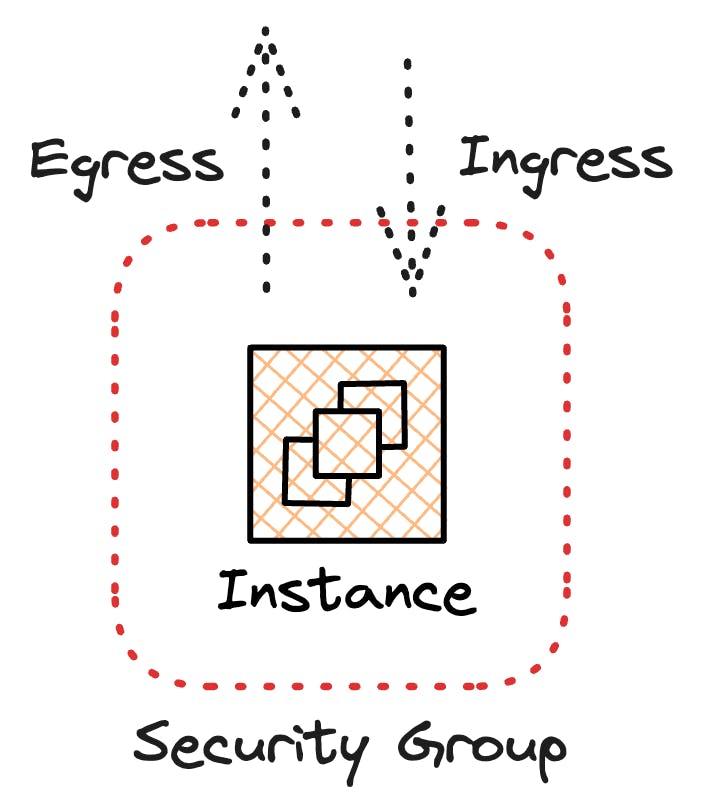
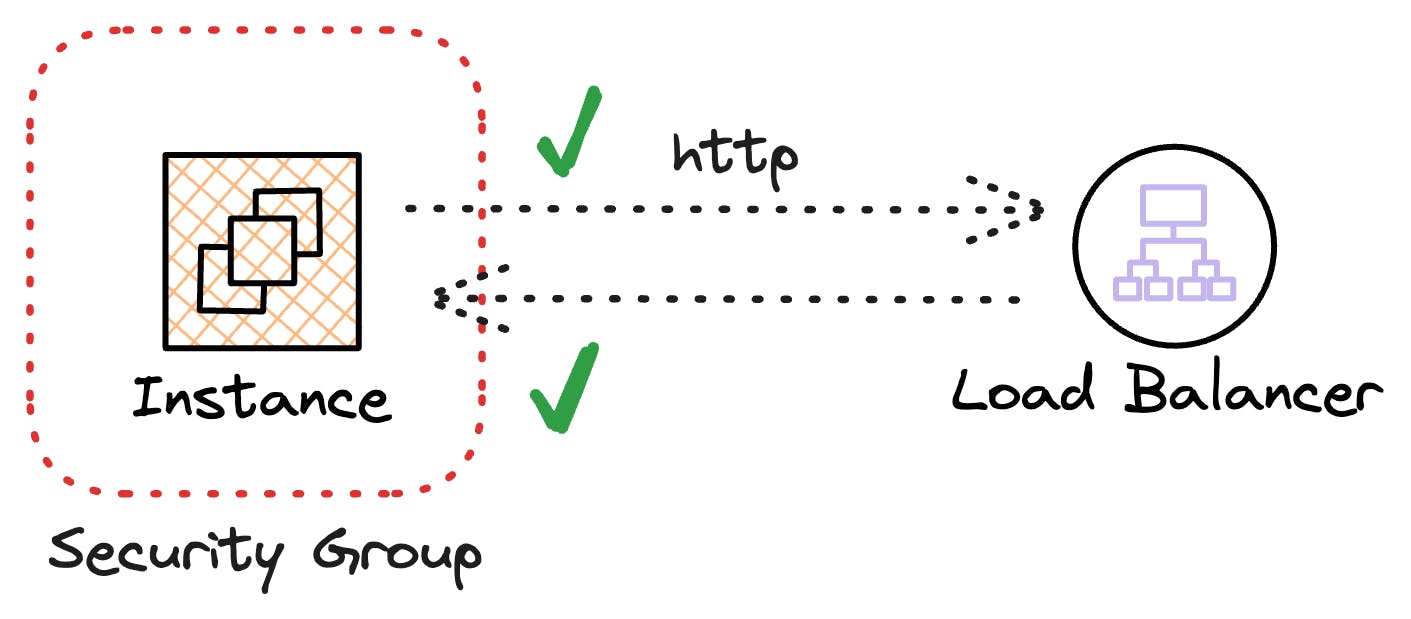
One essential note about security groups is that they are stateful. What does that mean? "Stateful" means the security group remembers the traffic's context or 'state'.
If an EC2 instance sends a request to access a load balancer on port 80, the security group allows the response from that website to come back in.
Another way to think of it is to let out, let in.
If the load balancer initiated the traffic and there was no ingress rule to allow it, the security group would block that traffic.
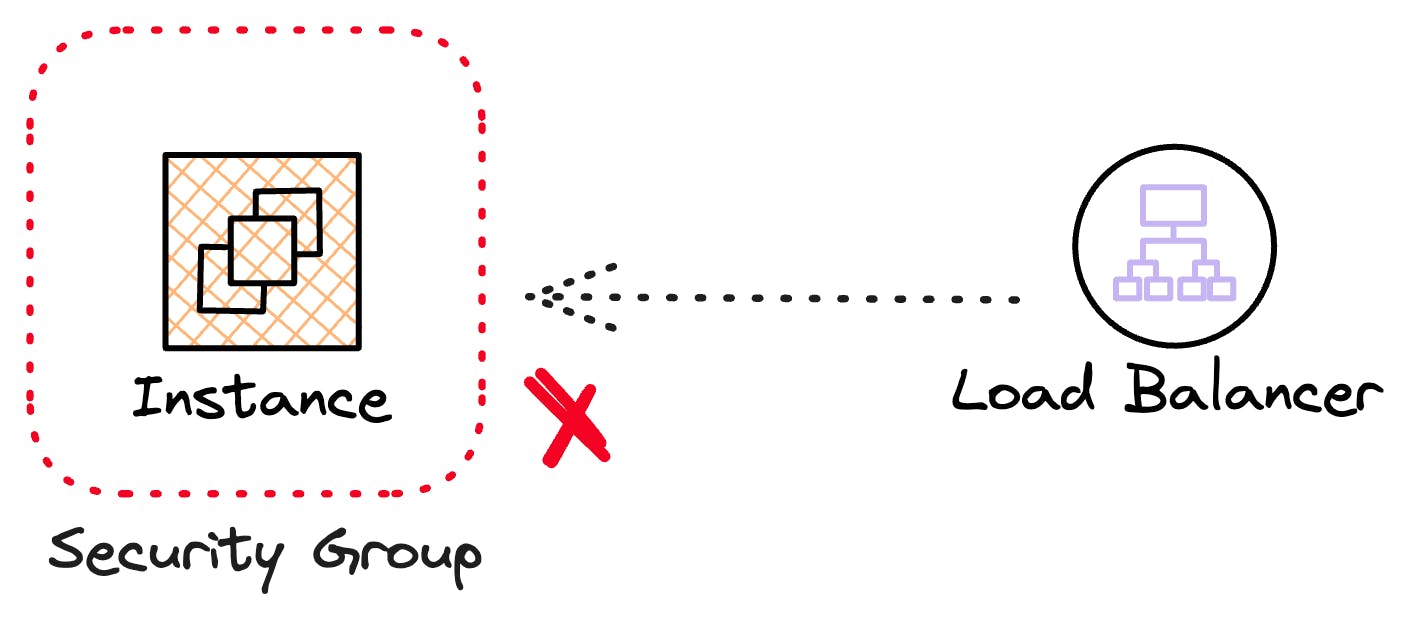
The security group rules for the examples above would look like this
| Type | Protocol | Port Range | Source/Destination | Description |
| Ingress | - | - | - | No ingress rules (no traffic in) |
| Egress | TCP | 80 | 0.0.0.0/0 | Allows HTTP traffic out to the Load Balancer |
It is worth noting that when creating a security group the default value for Egress traffic is to let everything out.
Network Access Control Lists
A Network Access Control List, usually shorted to NACLs, also lets us control the traffic allowed in (ingress) and out (egress); however, they are associated with one or many subnets and affect all resources within that subnet.
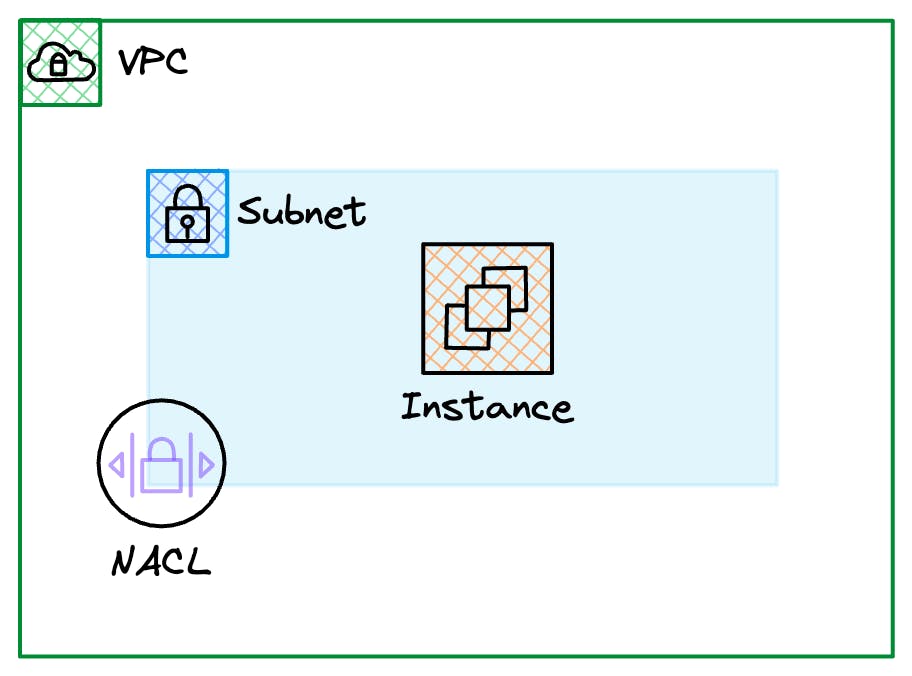
Another significant difference is that they are stateless. What does that mean? "stateless" means the NACL does not track the traffic's context or 'state,' so rules need to be configured for the inbound and return traffic.
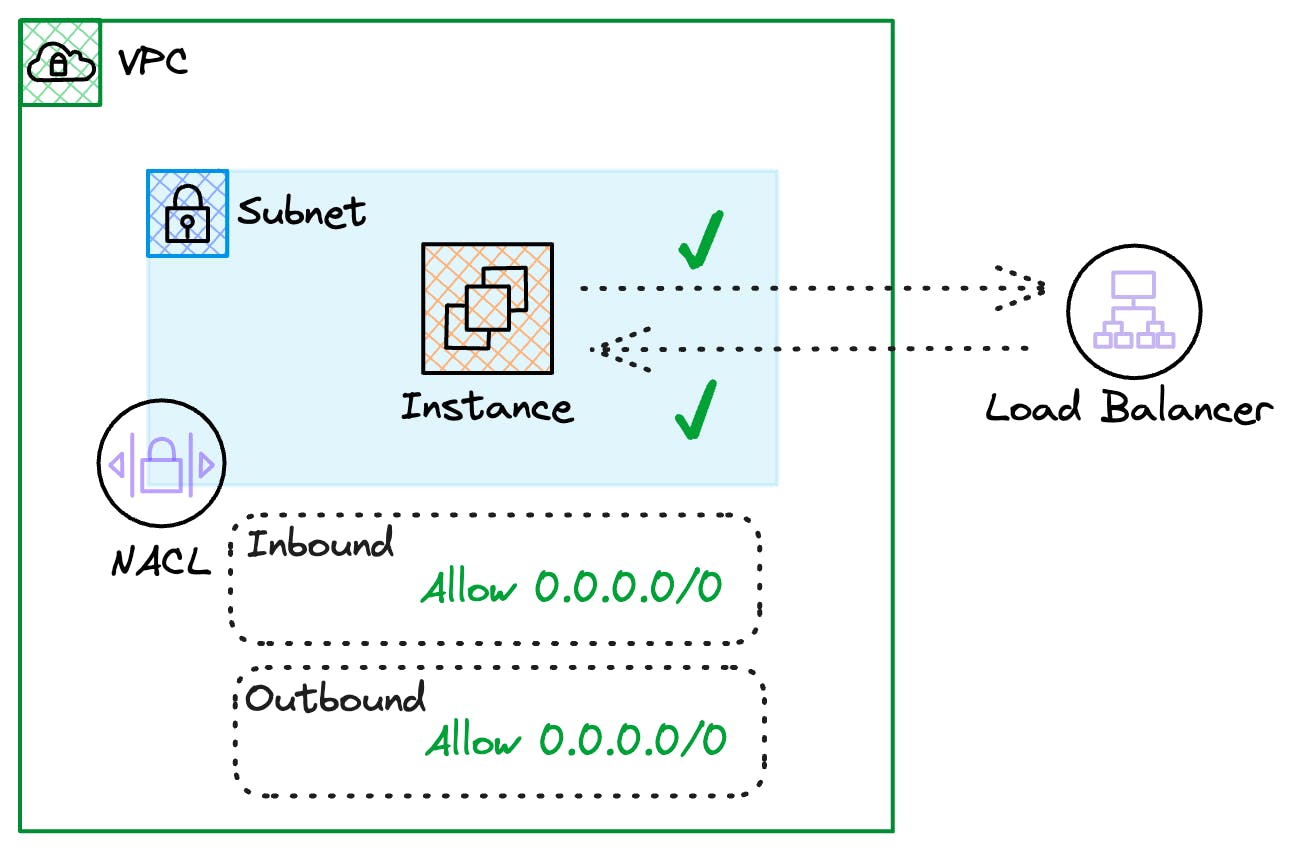
Both the Inbound and outbound rules must match the traffic pattern for our instance to communicate with the Load Balancer that sits outside our subnet.
The following images show the default NACL rules. As you can see, they will allow all traffic by default.


Another difference from the Security Group is that the rules are given a number from 1 to 32766.
This rule number determines the order in which they are assessed, with the last rule always being a denial that can't be removed. Rules are processed from the lowest number first.
If, for example, we wanted to deny only outbound traffic on port 80, we could implement the following rule in our Outbound NACL.
| Rule number | Type | Protocol | Port Range | Source | Allow/Deny |
| 100 | All traffic | All | 80 | 0.0.0.0/0 | Deny |
| 110 | All traffic | All | All | 0.0.0.0/0 | Allow |
| * | All traffic | All | All | 0.0.0.0/0 | Deny |
As traffic passed through the NACL, anything destined for port 80 would be blocked by rule number 100; however, traffic on any other port would be allowed to pass.
NACLs are a harder guardrail when designing and protecting traffic in a VPC. The most important thing is to remember that traffic needs to be allowed both ways explicitly.
For further information, the AWS documentation does a good job of describing the various scenarios when dealing with NACLs.
https://docs.aws.amazon.com/vpc/latest/userguide/vpc-network-acls.html#nacl-ephemeral-ports
Internet Gateway
An Internet Gateway is an AWS resource that AWS fully manages. All we need to do is create one and associate it with our VPC. AWS will manage the scaling, redundancy and availability of it for us.
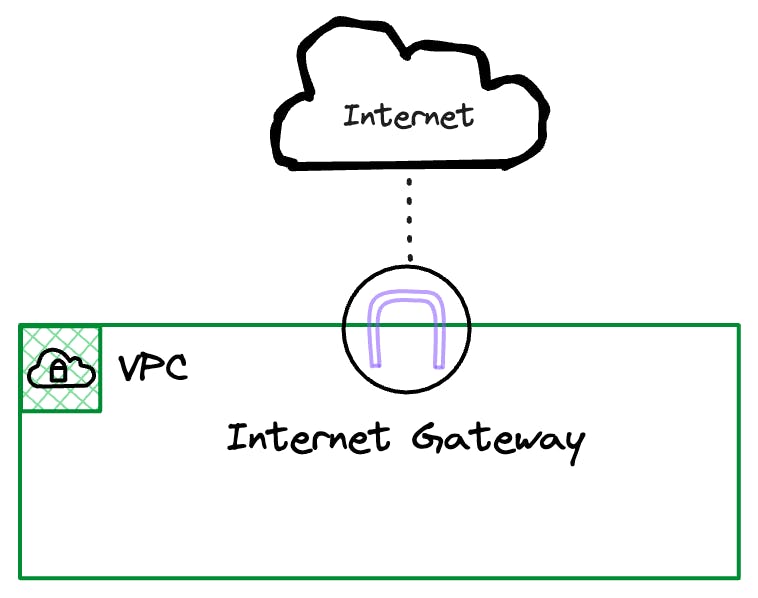
There is no cost for having an Internet Gateway attached to your VPC, but you will be charged for traffic that passes through it.
NOTE: You can only have a single Internet Gateway attached to your VPC and it doesn't have any association with Availability Zones as it is considered a Region level resource.
Route Tables
Route tables allow us to control traffic flow throughout the VPC and in and out of a VPC. They are associated with one or many subnets and affect all resources within those subnets.
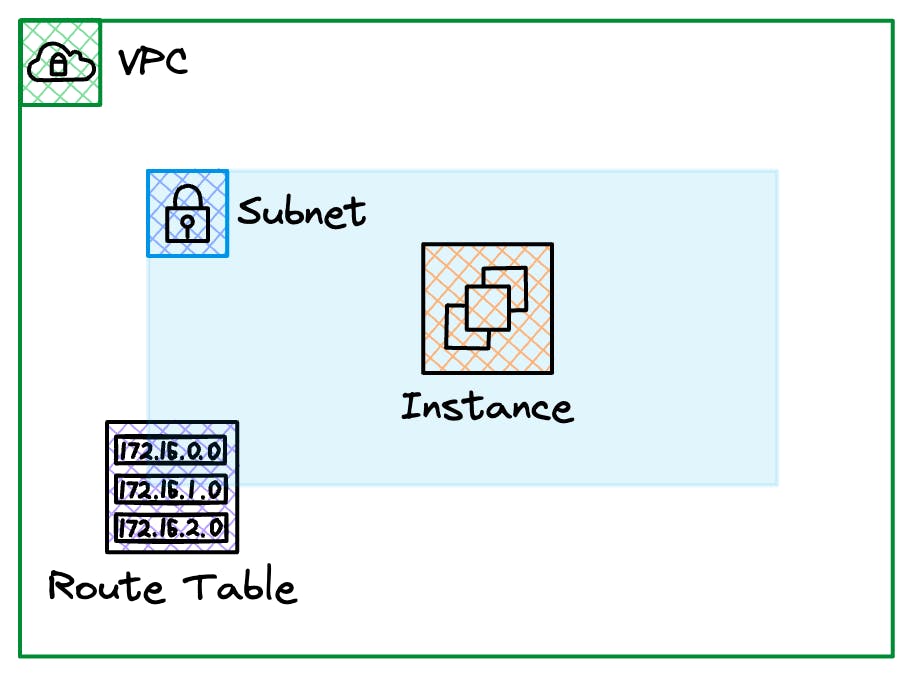
By default, a VPC only comes with a single route table referred to as the Main route table; however, you can create multiple to assist in controlling your traffic flow. Additional route tables are referred to as Custom route tables.
Route tables have many properties, but for this introduction, we will introduce the Destination and Target attributes required for each Route within the route table.
Destination—The range of IP addresses where you want traffic to go (destination CIDR). Think of this as the CIDR block or the group of IP addresses where you want to direct your traffic
Target—The gateway, network interface, or connection to send the destination traffic. Think of this as the path or the specific method to send your traffic to its destination. It could be a gateway, a specific network interface, or a particular type of connection that acts like a bridge to get your traffic where it needs to go.
To see how these work let's look at the Default VPC again but with a little more detail.
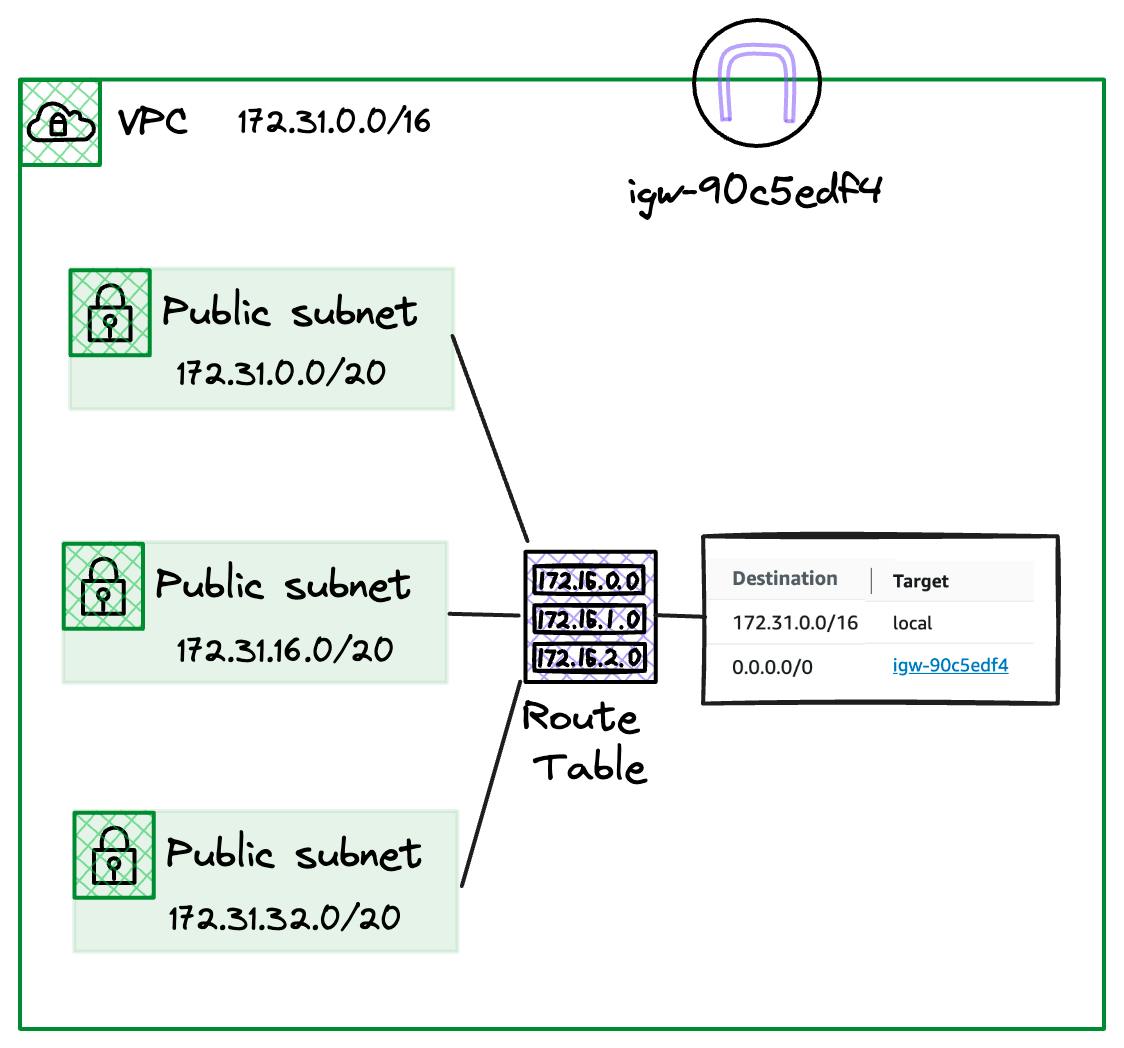
As you can see, our three Public Subnets are all carved out of the 172.31.0.0/16 CIDR block assigned to the VPC. We also have an Internet Gateway with the ID igw-90c5edf4 and two entries in our Default route table.
Firstly, we have a route to 172.31.0.0/16 with a Target of local, which is a little special. This entry matches the CIDR block assigned to the VPC and will be present in both the Default Route table and any created custom ones.
This route enables communication of all the subnets carved out of the 172.31.0.0/16 CIDR block. Even if we create more subnets, they will all be associated with the Default route table and be able to communicate.
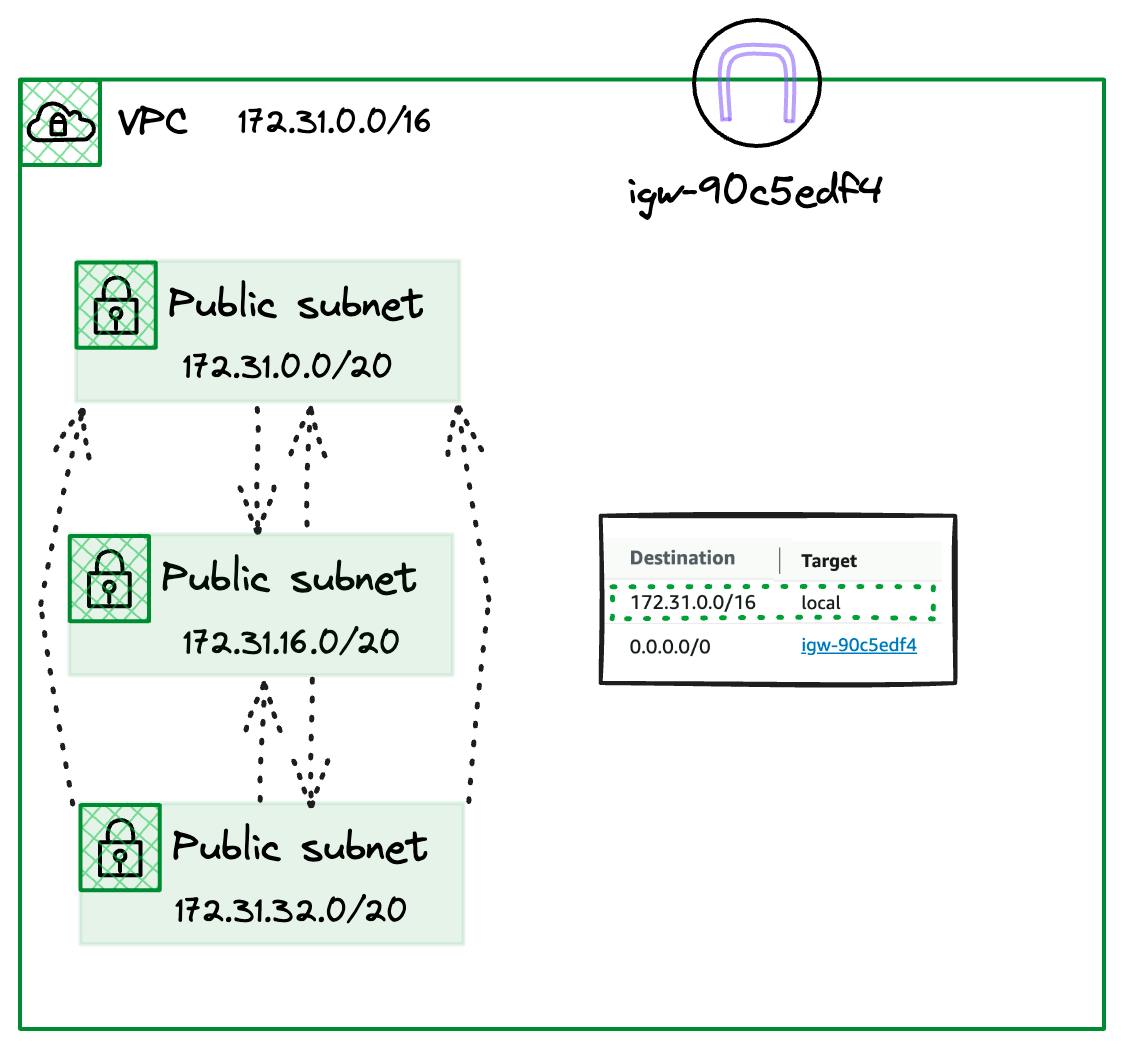
NOTE: We still need the appropriate Security Groups & NACLs rules on our resources to allow this traffic. However, this route entry will ensure your traffic reaches its target within the VPC Subnets.
Our second route has a Destination of 0.0.0.0/0, which in the CIDR notation is a catchall for all IPv4 traffic. It has a Target of the Internet Gateway resource ID.
This entry will send traffic not destined for our VPC CIDR, such as a public website, to the Internet Gateway associated with our VPC.
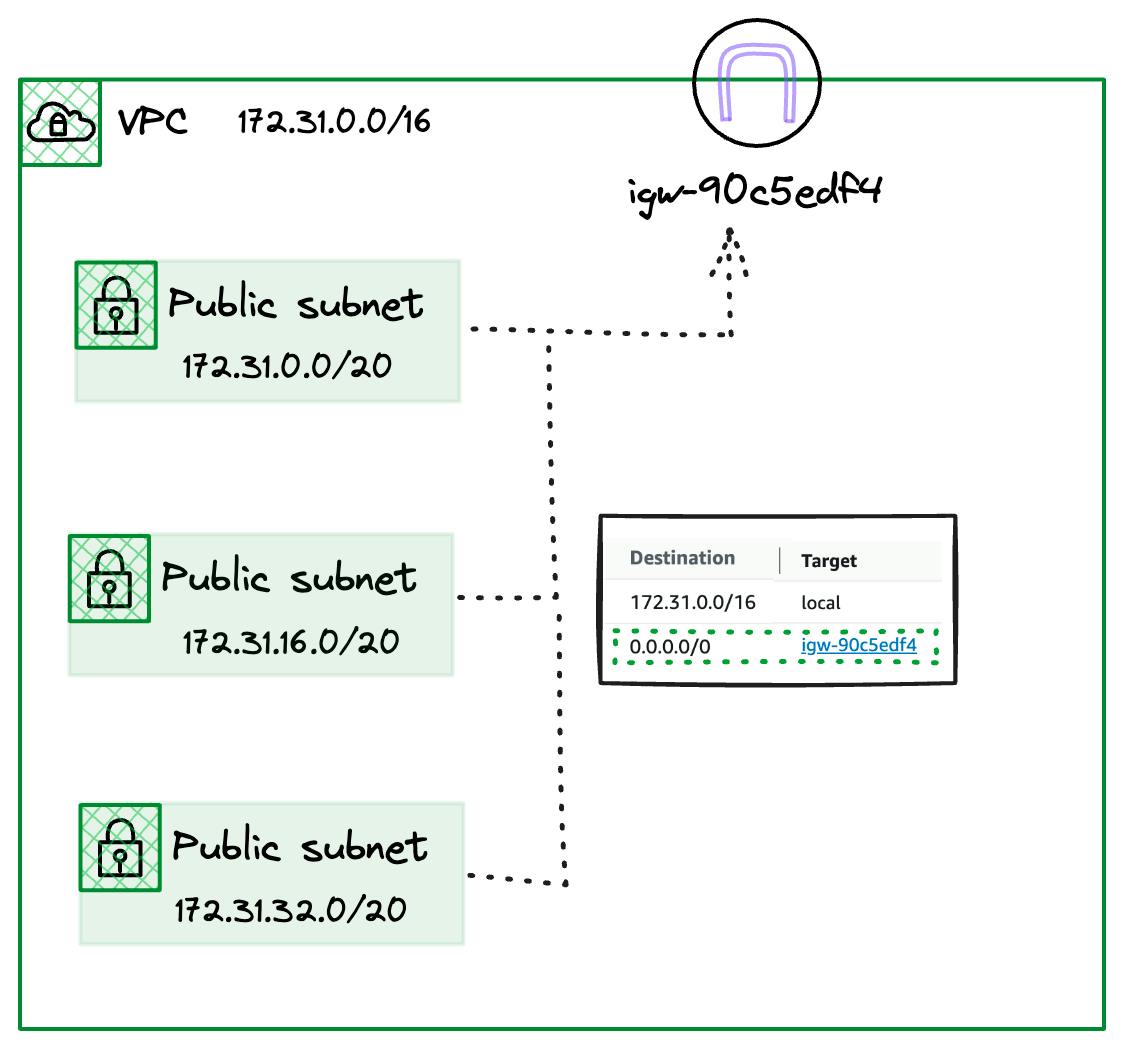
NOTE: This makes these subnets "Public" as they have a route with a destination to the Internet.
Summary
In this article, we have introduced some key AWS Virtual Private Cloud concepts. The VPC is a foundational component for all things in AWS networking, so having a solid background in these concepts is necessary. We have only touched on some of these and will explore more in part II.
Check out the AWS Fundamentals VPC infographic here! that can be used as a reference.
If you are keen to get more info right now, go check out the [VPC Endpoints](https://blog.awsfundamentals.com/vpc-endpoints) on the AWS Fundamentals Blog!

