


Amazon S3 (Simple Storage Service) is an object storage service that allows you to store and retrieve large amounts of unstructured data from anywhere on the web. Launched by AWS in 2006, S3 is highly scalable and offers a cost-effective solution for data storage needs. With S3, you can store various types of unstructured data, such as videos, images, audio files, and any other type of data that doesn't fit neatly into a database.
In this article, we will discuss how to use S3 with Terraform, a popular Infrastructure as Code (IaC) tool. We will cover the basics of creating an S3 bucket and applying IAM policies to it to control access. Additionally, we will explore some of the advanced features that Terraform offers for S3, such as lifecycle rules, versioning, and object-level encryption.
Finally, we'll go over some best practices for using S3 with Terraform, including resource tagging, version control, and testing environments. By the end of this article, you will have a good grasp on the basics of Interacting with S3 using Terraform.
Prerequisites
This post assumes a basic understanding of both Terraform and AWS. If you are not yet familiar with Terraform, feel free to explore our comprehensive introduction to Terraform.
In addition, you’d need the following installed:
Terraform CLI
the AWS CLI
Creating an S3 Bucket
We'll start by creating a new directory for the project and a file named main.tf, where all the Terraform configurations will be placed. You can accomplish this by executing the following commands:
mkdir terraform-s3 && touch terraform-s3/main.tf
Open main.tf in your preferred text editor and follow along with our basic provider configuration and the creation of a new S3 bucket.
terraform {
  required_providers {
    aws = {
      source = "hashicorp/aws"
      version = "4.64.0"
    }
  }
}

provider "aws" {}

resource "aws_s3_bucket" "s3" {
  bucket = "terraform-experiments"
}
In just three lines of HCL, we've defined a new S3 bucket. But what exactly is happening here?
Using the resource block, we've defined a new resource of type aws_s3_bucket. This tells Terraform that we want to create a new S3 bucket in our AWS account.
Inside the aws_s3_bucket block, we've specified the name of our bucket using the bucket field. In this case, we've named it terraform-experiments, but you can choose any name that meets the requirements for S3 bucket names.
It's worth noting that while the bucket field is optional, it's considered a best practice to give your resources descriptive names to help with organization and management.
Before we can apply our configuration and create the S3 bucket, we need to initialize the Terraform module by running terraform init in our terminal. This command downloads the necessary provider plugins and sets up the backend for storing the state file.
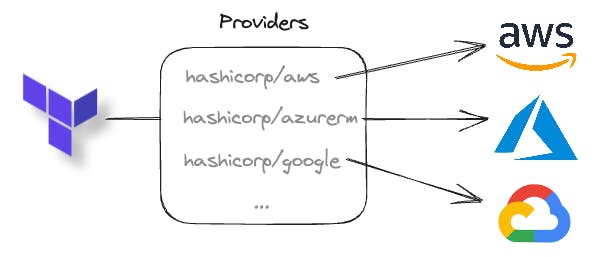
Terraform is not limited to a specific cloud; rather, it uses provider plugins to facilitate infrastructure management across all major cloud providers. Additionally, there are community plugins available for other popular services, such as Cloudflare.
To see a preview of the resource that will be created, you can run the terraform plan command in your terminal. This will show you what changes Terraform will make to your infrastructure based on the configuration in your main.tf file. The output should look similar to this:
# aws_s3_bucket.s3 will be created
  + resource "aws_s3_bucket" "s3" {
      + acceleration_status         = (known after apply)
      + acl                         = (known after apply)
      + arn                         = (known after apply)
      + bucket                      = "terraform-experiments"
      + bucket_domain_name          = (known after apply)
      + bucket_prefix               = (known after apply)
      + bucket_regional_domain_name = (known after apply)
      + force_destroy               = false
       {
                  + kms_master_key_id = (known after apply)
                  + sse_algorithm     = (known after apply)
                }
            }
        }

        .....
        # ommited for brevity
      + versioning {
          + enabled    = (known after apply)
          + mfa_delete = (known after apply)
        }

      + website {
          + error_document           = (known after apply)
          + index_document           = (known after apply)
          + redirect_all_requests_to = (known after apply)
          + routing_rules            = (known after apply)
        }
    }

Plan: 1 to add, 0 to change, 0 to destroy.
Once satisfied with the output, run terraform apply to apply the configuration and in a few seconds you should have an S3 bucket.
Uploading Files to S3
Now that we have created an S3 bucket, let's upload some files to it. To do this, create a new file called document.txt within the terraform-s3 directory and add some sample text using the following commands:
touch terraform-s3/document.txt && echo "hello from earth" > terraform-s3/document.txt
To upload the object to the newly created s3 bucket update our main.tf file with the following code:
terraform {
  required_providers {
    aws = {
      source = "hashicorp/aws"
      version = "4.64.0"
    }
  }
}

provider "aws" {}

resource "aws_s3_bucket" "s3" {
  bucket = "terraform-experiments"
}

resource "aws_s3_object" "object" {
  bucket = aws_s3_bucket.s3.bucket
  key    = "document.txt"
  source = "./document.txt"
}
In the code above, we have added the aws_s3_object resource, which enables us to upload objects into the newly created S3 bucket. The bucket field is used to specify the target bucket for the file upload, while the 'key' field is used to determine the name of the file after it has been uploaded to the bucket. Lastly, the source field allows us to specify the path to the text file that we created earlier.
Run terraform apply and you'll be prompted to confirm the changes before they are made. Type yes to proceed.
After Terraform has finished applying the changes, we can verify the file has been uploaded by using the AWS CLI:
aws s3api list-objects --bucket terraform-experiments
The output should look similar to this:
{
    "Contents": [
        {
            "Key": "document.txt",
            "LastModified": "2023-05-03T23:09:25+00:00",
            "ETag": "\"e779f2f40841bb63e0a431f8986a0fa7\"",
            "Size": 13,
            "StorageClass": "STANDARD",
            "Owner": {
                "DisplayName": "",
                "ID": "3bed723bce315f4a50a9cd9d5d9d1446a2495ede50040ab6fd6a26d250fdf20d"
            }
        }
    ]
}
Once the object is uploaded, you can access it by visiting the URL in the format of https://<YOURBUCKETNAME>.s3.amazonaws.com/document.txt. For example, in our case, the URL would be https://terraform-experiments.s3.amazonaws.com/document.txt.
If you visit the URL, you will encounter an Access Denied error message. This occurs because, by default, objects uploaded to an S3 bucket are private and not accessible to the public.
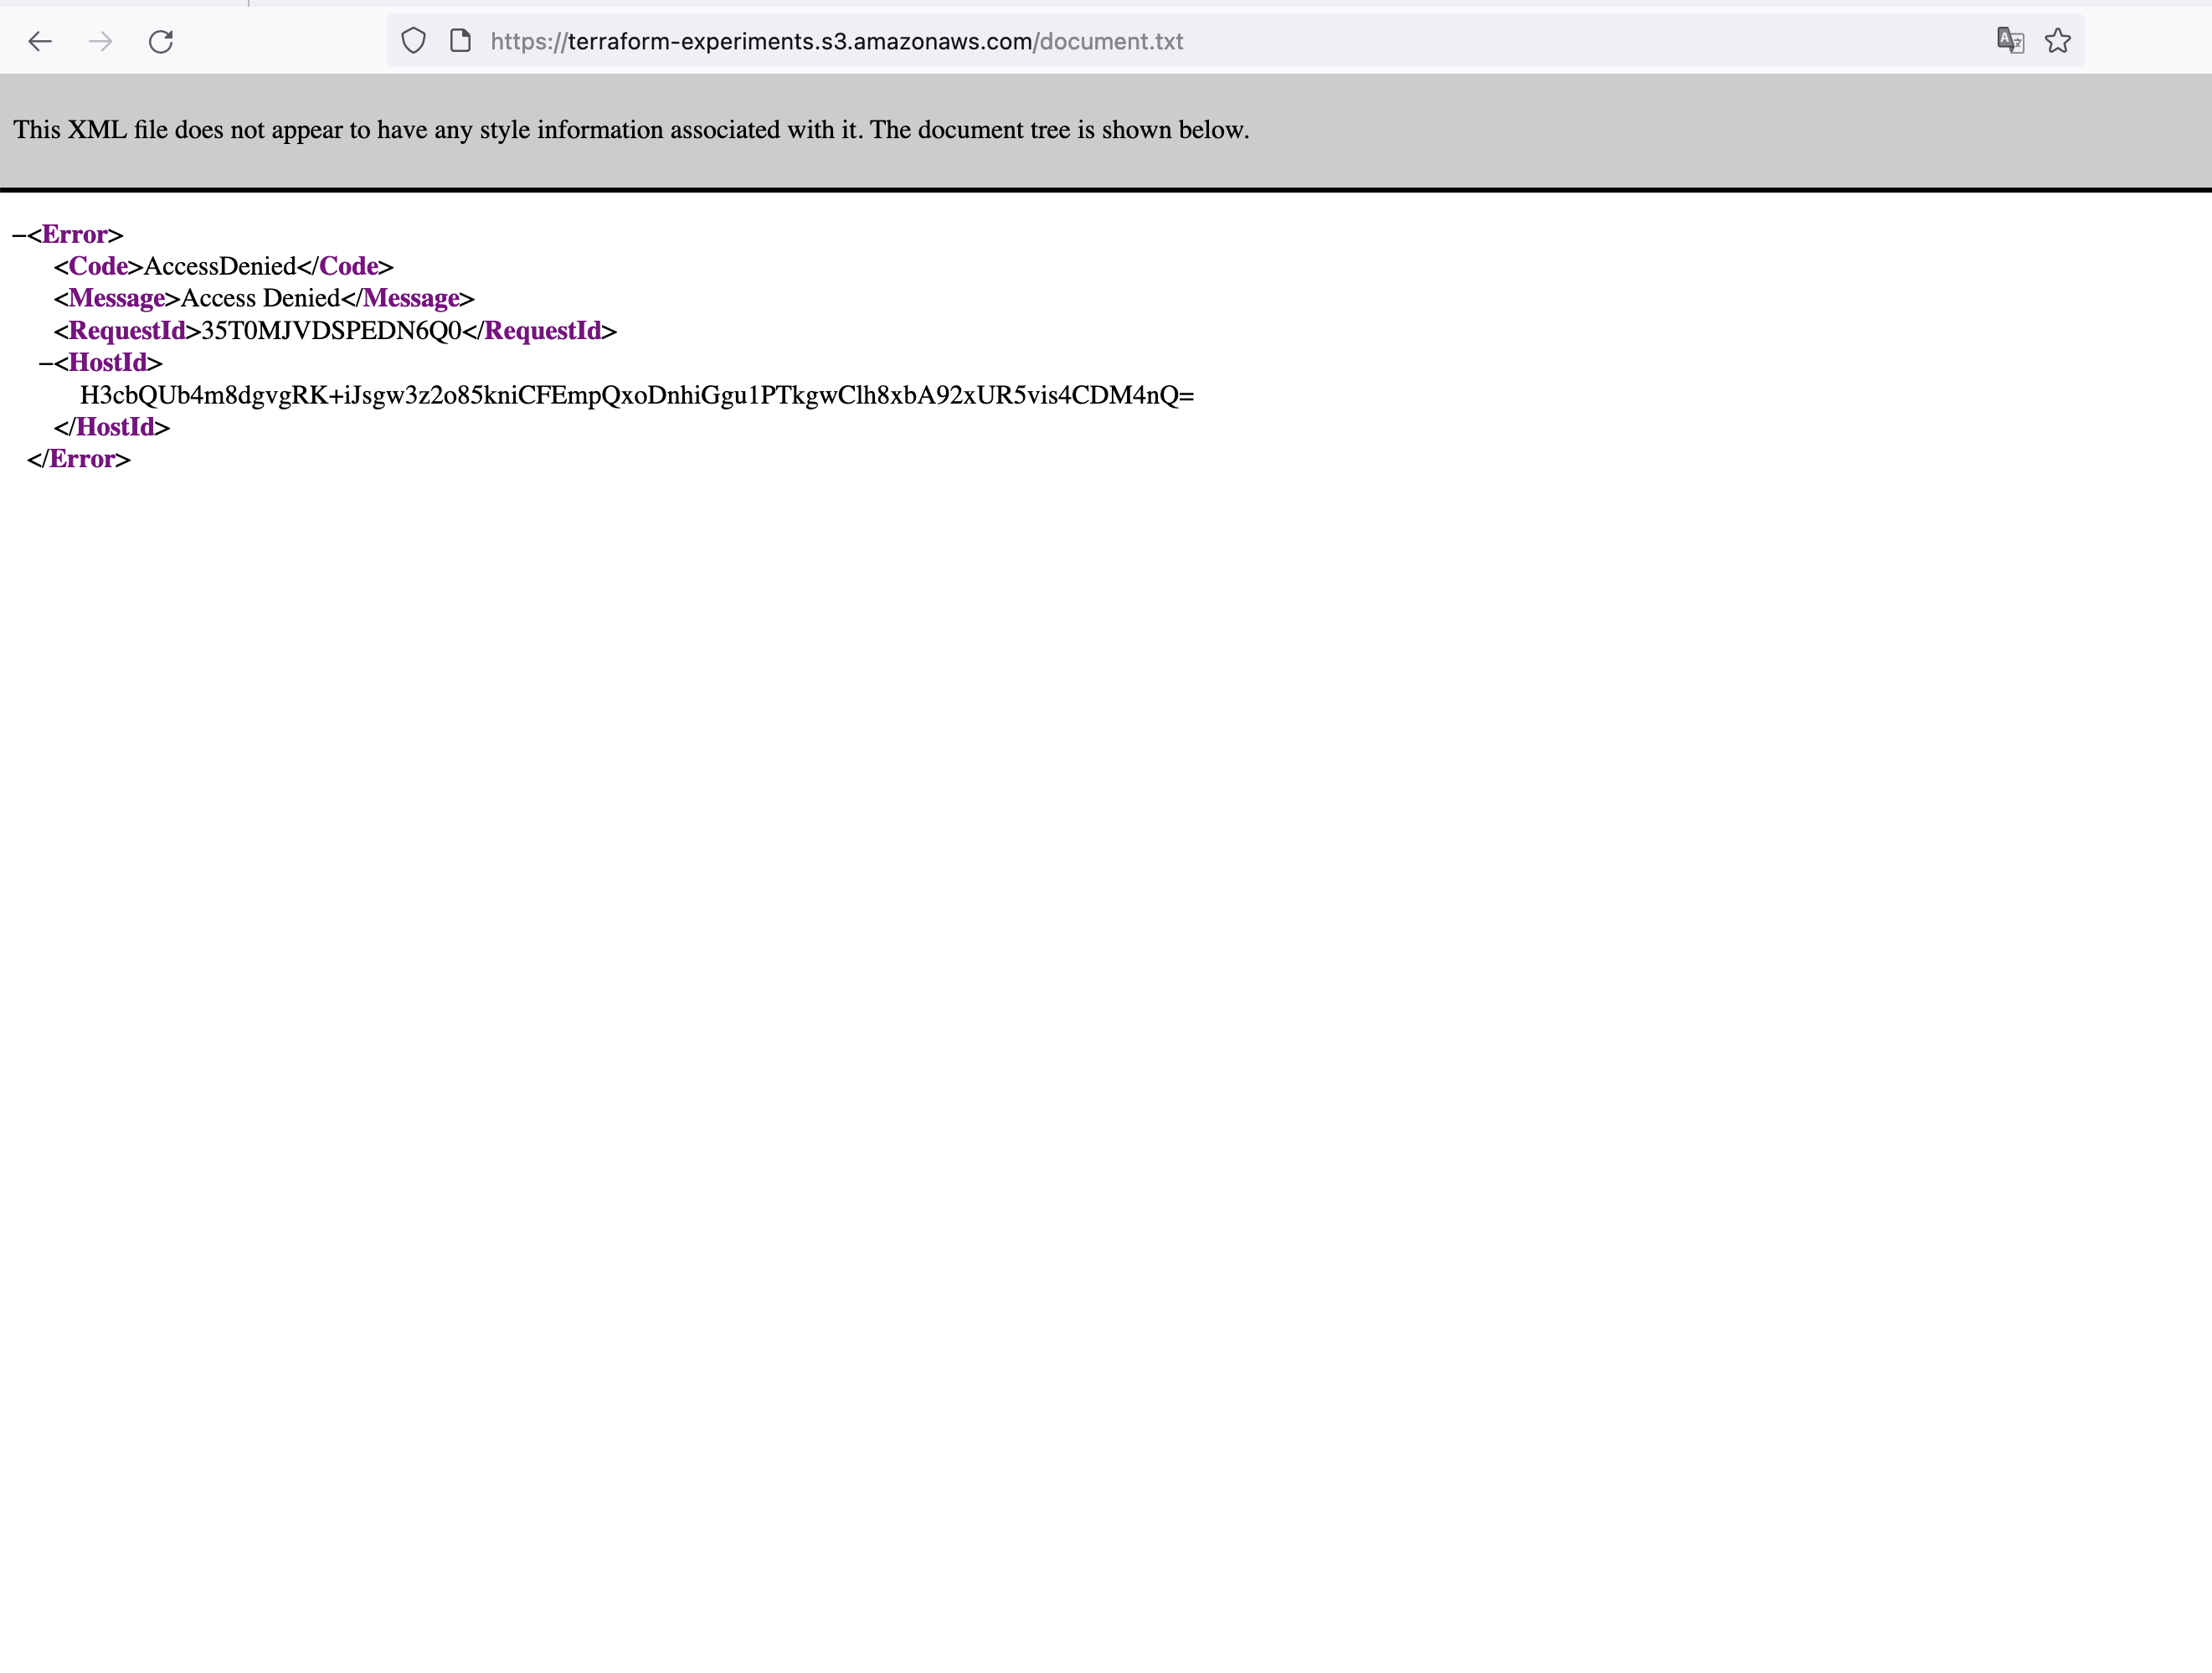
This occurs because, by default, objects uploaded to an S3 bucket are private. In the following section, we will explore how to enable public access to objects within our S3 bucket.
Configuring ACLs for S3 Buckets in Terraform
To grant public access to the recently uploaded text file, let's make a few modifications to the existing code and adjust the Access Control List (ACL) settings for our bucket and file.
terraform {
  required_providers {
    aws = {
      source = "hashicorp/aws"
      version = "4.64.0"
    }
  }
}

resource "aws_s3_bucket" "s3" {
  bucket = "terraform-experiments"
}

resource "aws_s3_bucket_ownership_controls" "ownership" {
  bucket = aws_s3_bucket.s3.id
  rule {
    object_ownership = "BucketOwnerPreferred"
  }
}

resource "aws_s3_bucket_public_access_block" "pb" {
  bucket = aws_s3_bucket.s3.id

  block_public_acls       = false
  block_public_policy     = false
  ignore_public_acls      = false
  restrict_public_buckets = false
}

resource "aws_s3_bucket_acl" "acl" {
  depends_on = [aws_s3_bucket_ownership_controls.ownership]
  bucket = aws_s3_bucket.s3.id
  acl    = "private"
}

resource "aws_s3_bucket_object" "object" {
  bucket = aws_s3_bucket.s3.bucket
  key    = "document.txt"
  source = "./document.txt"
  acl    = "public-read"
}
We added a new aws_s3_object resource and added an acl field with a value of "public-read". This makes the document.txt file public and accessible to everyone.
However, in practice, it's not always a good idea to make an entire S3 bucket public, especially in cases where you only want to expose specific objects. Therefore, it's recommended to use dedicated ACL resources to manage permissions for specific objects in an S3 bucket.
To demonstrate this, we added a new aws_s3_bucket_acl resource that sets the ACL for the entire bucket to "private". This ensures that the rest of the bucket remains private and only accessible to authorized users or applications.
The aws_s3_bucket_ownership_controls resource is used to configure the ownership controls for an S3 bucket. In this case, we've specified the BucketOwnerPreferred setting for the object_ownership attribute. This means that when an object is uploaded to the bucket, the owner of the bucket is also considered the owner of the object by default. This ownership control helps ensure that the bucket owner retains control and access over the objects stored within the bucket.
The aws_s3_bucket_public_access_block resource is used to enforce public access restrictions for an S3 bucket. The resource specifies the bucket attribute, which is set to aws_s3_bucket.s3.id, representing the ID of the S3 bucket resource created earlier.
By using a dedicated ACL resource, we make it easier to manage the permissions for individual objects in an S3 bucket, which improves maintainability. Additionally, it gives us the flexibility to explicitly expose specific objects without exposing the entire bucket.
We can preview the changes by running:
terraform plan
Once satisfied with the output, run:
terraform apply
This updates the S3 bucket using the defined ACL. To verify that it works, visit the following URL: .s3.amazonaws.com/document.txt.
Configuring Lifecycle Rules for S3 Buckets
Lifecycle rules in Amazon S3 allow you to define automated actions for managing the lifecycle of objects stored in your S3 buckets. These rules help optimize storage costs, improve performance, and ensure compliance through the use of data retention policies.
In this example, we have a single object in our S3 bucket. However, in production environments, there could potentially be thousands of objects in a single storage bucket. By leveraging lifecycle rules appropriately, companies could potentially save thousands on their AWS bill. One such application is how Canva uses lifecycle rules to manage infrequently accessed objects, resulting in $3 million in cost savings.
Now that you have a solid grasp of why lifecycle rules are important, let's implement them.
terraform {
  required_providers {
    aws = {
      source = "hashicorp/aws"
      version = "4.64.0"
    }
  }
}

provider "aws" {

}

resource "aws_s3_bucket" "s3" {
  bucket = "terraform-experiments"
}

resource "aws_s3_bucket_ownership_controls" "ownership" {
  bucket = aws_s3_bucket.s3.id
  rule {
    object_ownership = "BucketOwnerPreferred"
  }
}

resource "aws_s3_bucket_public_access_block" "pb" {
  bucket = aws_s3_bucket.s3.id

  block_public_acls       = false
  block_public_policy     = false
  ignore_public_acls      = false
  restrict_public_buckets = false
}

resource "aws_s3_bucket_acl" "acl" {
  depends_on = [aws_s3_bucket_ownership_controls.ownership]
  bucket = aws_s3_bucket.s3.id
  acl    = "private"
}

resource "aws_s3_bucket_object" "object" {
  bucket = aws_s3_bucket.s3.bucket
  key    = "document.txt"
  source = "./document.txt"
  acl    = "public-read"
}

resource "aws_s3_bucket_lifecycle_configuration" "lifecycle" {
  bucket = aws_s3_bucket.s3.id

  rule {
    id      = "example-lifecycle-rule"
    status  = "Enabled"

    transition {
      days          = 30
      storage_class = "STANDARD_IA"
    }

    expiration {
      days = 365
    }
  }
}
To implement lifecycle rules, we introduced a new configuration rule. This resource contains several important fields:
id- a unique identifier for the lifecycle rule. In this case, it is set to "example-lifecycle-rule".status- specifies whether the rule is enabled or disabled. In this example, it is set to "Enabled".transition- defines the action to be taken on objects after a certain number of days.storage_class- the target storage class for the objects. In this case, it is set toSTANDARD_IA, which represents the Standard-Infrequent Access storage class.expiration- the action to be taken on objects after a certain number of days.
Lifecycle rules assist in optimizing storage expenses by automatically transferring objects to a more affordable storage class or removing them when they become unnecessary. It is crucial to meticulously establish and examine lifecycle rules to guarantee they correspond with your data retention and access needs.
We can review the changes by using the terraform plan command, and once satisfied with the output, we can execute the final terraform apply command.
Summary
In this post, we demonstrated the use of Terraform to provision an S3 bucket. We also examined common use cases such as uploading objects, provisioning ACLs, and configuring lifecycle rules.
By leveraging Terraform's capabilities, you can automate the provisioning of S3 buckets, streamline access control configurations, and optimize storage costs through lifecycle management.
Frequently Asked Questions
How do I create an S3 bucket using Terraform?
To create an S3 bucket using Terraform, define a resource of typeaws_s3_bucketin yourmain.tffile and specify the name of the bucket using thebucketfield.How can I upload a file to an S3 bucket using Terraform?
To upload a file to an S3 bucket, create a newaws_s3_objectresource in your Terraform configuration, specifying the target bucket, key, and source file path.How do I configure Access Control Lists (ACLs) for an S3 bucket using Terraform?
To configure ACLs, use theaws_s3_bucket_aclresource. Specify the desired ACL settings, such as making a file public or private, by modifying theaclfield.How do I implement lifecycle rules for an S3 bucket using Terraform?
Use theaws_s3_bucket_lifecycle_configurationresource to define lifecycle rules. Specify actions like transitioning objects to another storage class or expiring objects after a certain number of days.How can Terraform help optimize storage costs in S3?
Terraform can help optimize storage costs by automating the provisioning of S3 buckets, configuring access control, and managing object lifecycles to transition objects to more affordable storage classes or delete them when no longer needed.
Are you interested in more?
Head over to our bi-weekly newsletter or check out the following blog posts