

AWS Organizations: The Key to Managing Your Cloud Infrastructure Effectively


AWS Organizations enables you to easily manage many accounts under a central organization. It includes account management and consolidated billing capabilities in a single place and tools like authorization and management policies to meet any security and compliance needs or requirements.
Introduction
A question that's often heard: why even bother creating several accounts?
AWS Identity and Access Management (IAM) is powerful enough to fulfill every security requirement that could exist within a single account. This means production, non-production, and every other resource can reside in one account. IAM groups and roles are responsible for segregating access.
Nevertheless, proper permission management for such a setup can be complex, not only because of the fact that you have to have a very strict naming and tagging concept from the start. Besides huge management efforts, this is not the best security approach and can easily end with compliance requirements that can't be fulfilled.
Importance of Proper Organization of Cloud Resources
An AWS account comes with the benefits of natural boundaries for security, access, and billing. There's no default access for outside users and created infrastructure is only allocated to your account.
If we look at our introduction, we see why it's good practice to make use of those boundaries by moving organizational and application structures into layers of several accounts that are strictly separated from each other.
For example into:
Two accounts - one for production and one for non-production/testing.
Many accounts - not only separating application environments but putting organization units into dedicated accounts. It's easily possible to reflect your organization's structure with a well-designed AWS multi-account setup.
AWS Organization will be the tool to help you organize those accounts with ease.
Centralized Consolidation with AWS Organizations
AWS Organizations allows you to centrally manage and govern a range of accounts in a single entity, from a single place.
The set of powerful features includes amongst others:
Account Management - create and manage multiple accounts in one place. You can move existing accounts into an organization, create new member accounts from a single place and also add automation rules for the creation of new accounts.
Consolidated billing - member accounts of your organization won't have to deal with billing as it's propagated up to the management account. Nevertheless, each AWS account can make use of the Free Tier.
Applying policies and permissions across accounts - you're able to apply permissions and compliance policies through different accounts and control them in one place. This also allows you to enable cross-account access.
Identity Federation - AWS Organizations allows central management of identities and permissions throughout the organization. This includes federating with a cooperate directory to enable Single Sign-On via AWS Identity Center.
This is only a small outtake of its powerful features.
Key Concepts of AWS Organizations
Before jumping into practice, let's focus on the key concepts of AWS Organizations. Those are important to understand its inner mechanics.
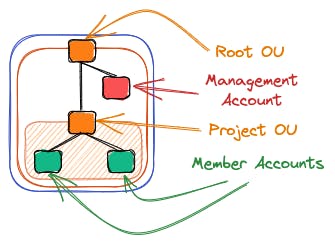
Management Account - The Organization's Owner
The management account is the initial account that was used to create the organization. It has full access to all AWS resources and services.
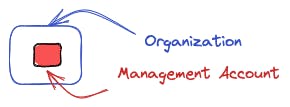
Due to its unlimited permissions, it should only be used for the initial setup and account management tasks. But more on the best practices for working with the management account in the later chapters.
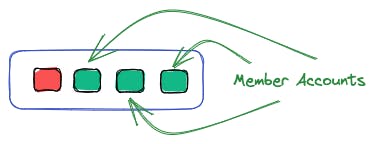
Organizations - A Container for Multiple AWS Accounts
An organization is a container for multiple AWS accounts. It enables you to manage those in one central place, allowing you to apply policies and permissions across all accounts.
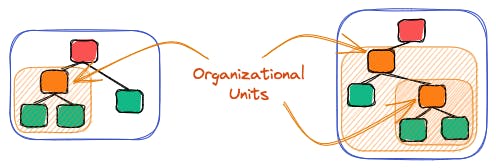
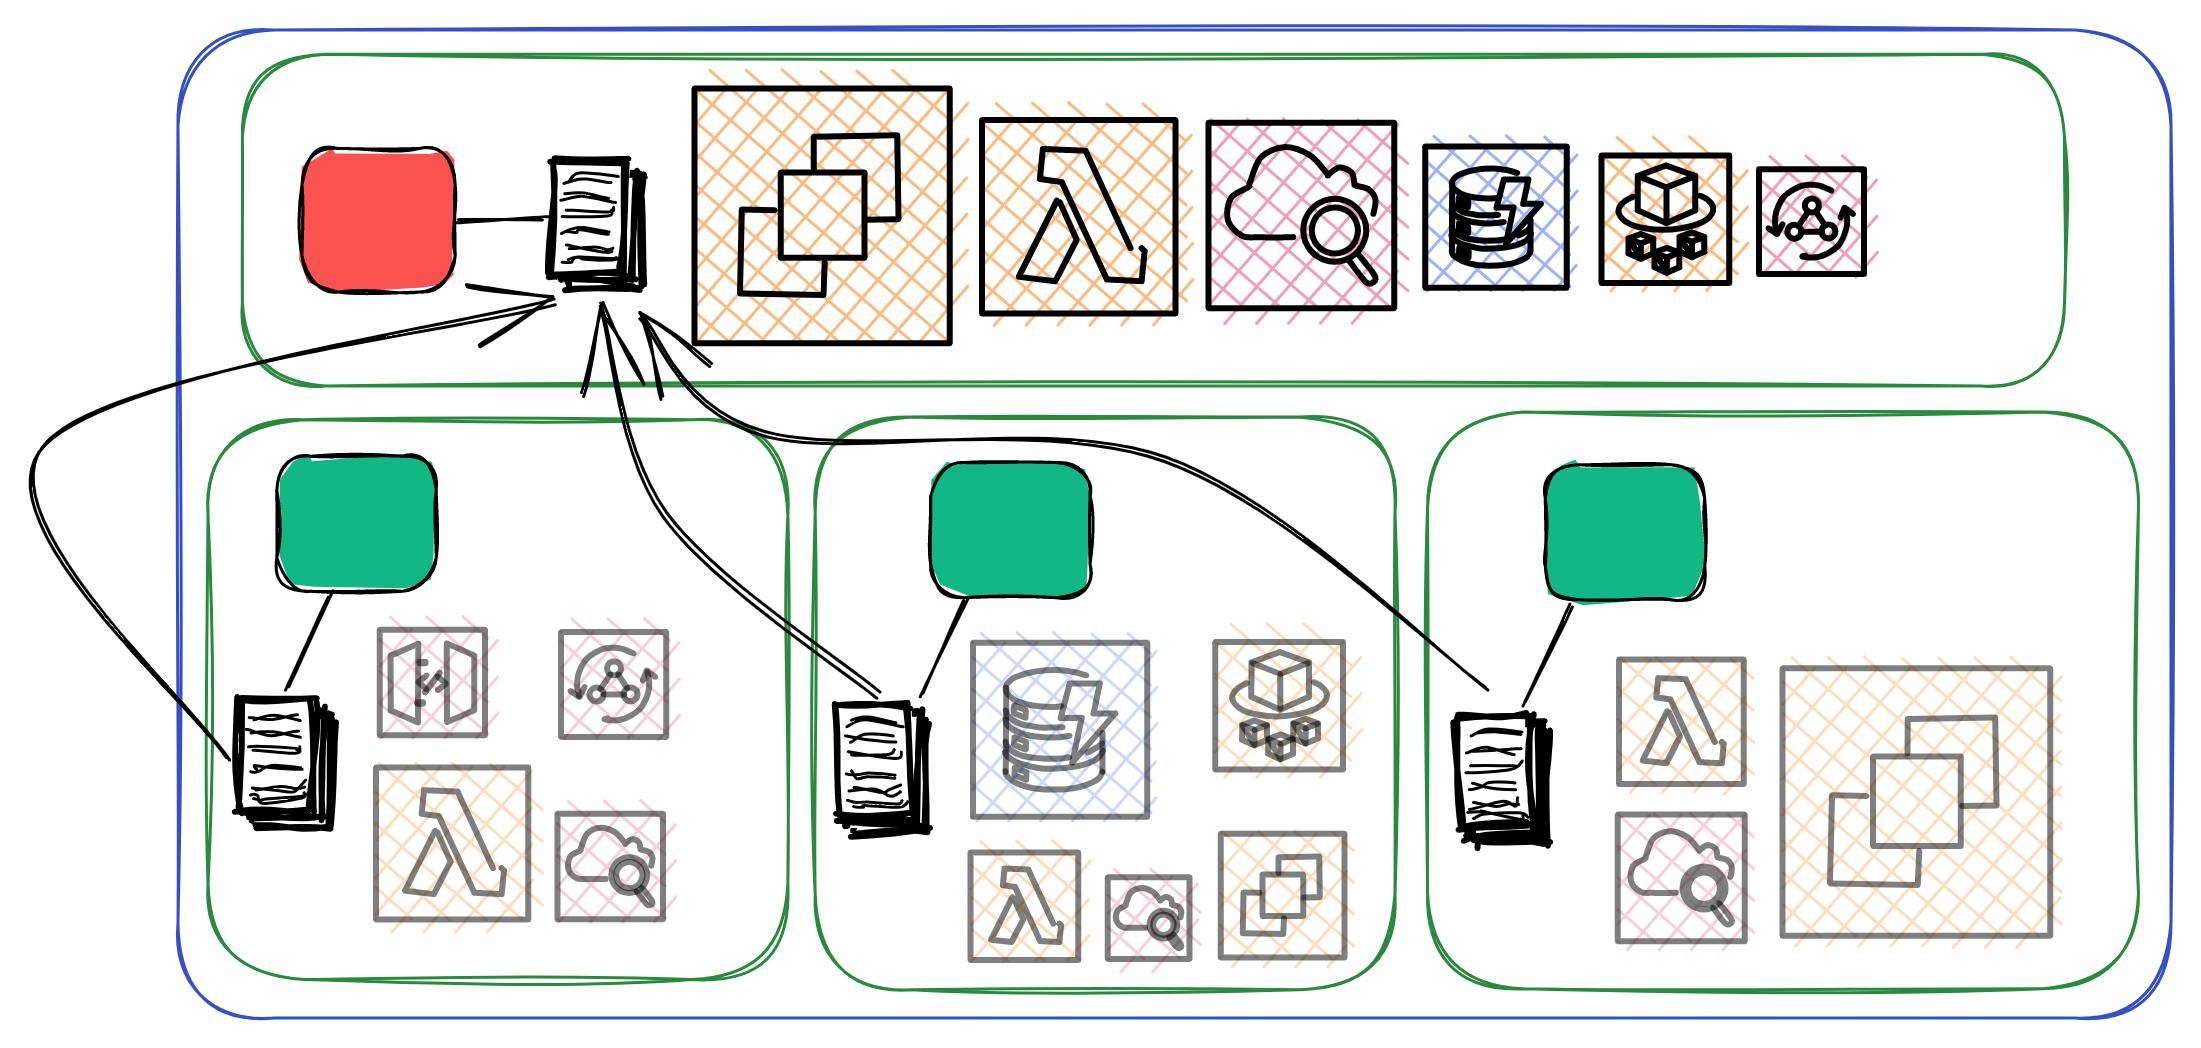
Organizational Units - A Logical Grouping of Accounts
Organizational units are another tool for fine-grained management. Each unit is a logical container that can include accounts and other organizational units. This allows for the structuring of applications, projects, or even the layers of your organization.
Service Control Policies to Restrict Access to Services and Resources
Service Control Policies (SCPs) can be applied to an organization, organizational unit, or individual account. They allow you to restrict access to AWS resources and services.
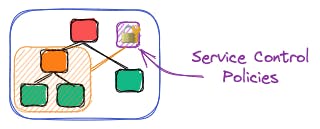
They help you to apply fine-grained permissions across your set of accounts so you can fulfill compliance rules and enforce strict security setups.
Consolidated Billing - Billing in a Single Place
With Consolidated Billing, payment for all member accounts will be moved to the management account. The management account can also access all billing and account information, including member account activity within the organization.
This not only simplifies the billing process but also allows you to gain deep insights into the spending of your organization.
Federated and Delegated Access
Working with multiple accounts and IAM roles can be tedious. With AWS Organizations you can manage permissions and roles for all users in one place.
With Identity Federation and IAM Identity Center, users can access multiple accounts within the organization with a single set of credentials. You're able to define roles they can assume and therefore the final permissions they will receive.
Working with AWS Organizations
Let's put the learnings into practice and create our first organization and a small organizational structure that features multiple accounts.
We'll perform the following steps:
create an organization that is owned by our root account
invite accounts to our organization
form an organizational unit and move accounts into it
create a service control policy and apply them to our organization unit
test the restrictions that we've enforced through our service control policy

With this hands-on guide, you'll lay the knowledge foundations to build a tailor-made organizational structure for any requirement or preference.
Creating an Organization
To create an AWS organization, we'll need to have an AWS account first. Once we have it, we can create an organization via the AWS management console through the following steps:
Open the AWS Organziations console.
Click on the
Create an organizationbutton.
AWS will then create your organization, which can take a few seconds. You'll be taken to the accounts overview page.
Your root account will be the only member for this AWS organization now and it will be included in the organizational unit Root. Your account will also be tagged with management account, as it's the owner of the organization with every possible permission.
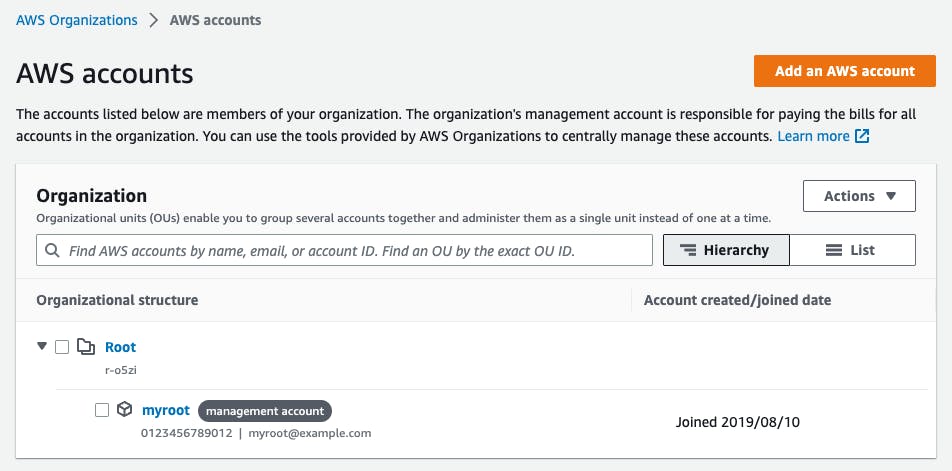
If you didn't verify your email address for your root account, you'll receive a confirmation email which you have to verify in the next 24 hours.
Setting up New or Inviting Existing Accounts
Now that we've got our organization, we want to invite the first member account. We have two options for this:
Creating a new AWS account.
Inviting an existing AWS account via the account owner's email address or 12-digit account identifier. In this case, the owner will receive an email with a link to accept the invitation to the organization.
Let's choose option one to create a new account.
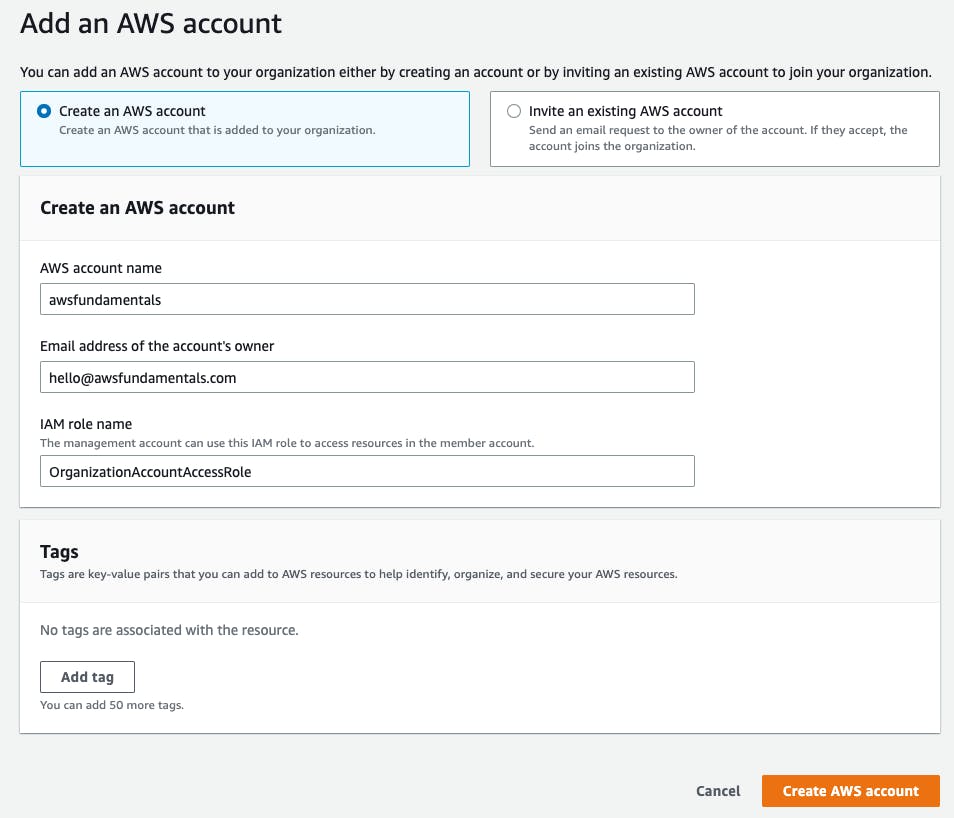
After we've created the new account we'll receive the necessary details via an email to the address we've entered. The new account will automatically be part of our organization now.
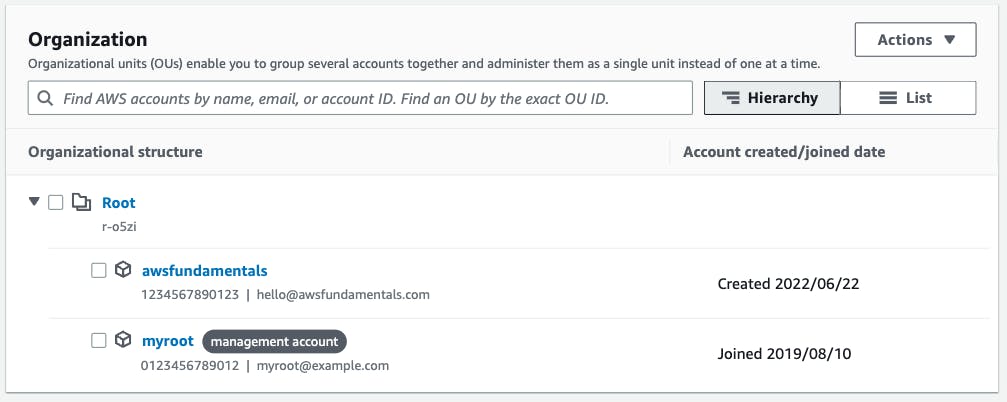
Both of our accounts are now part of the root organizational unit.
Forming Organizational Units
Organizational Units (OU) are one of the key elements to properly structuring our organization and assigning permissions easily. As we've seen, by default, there is always the root unit, which affects all accounts in the organization.
You're free to create any hierarchy of OUs below root and assign accounts to them. Policies that are applied to an OU will affect all included accounts and also accounts that are within nested OUs. With this, you can easily enforce compliance rules in a single place for many accounts.
Let's create a new organizational unit by selecting our root OU and clicking Actions > Create new.
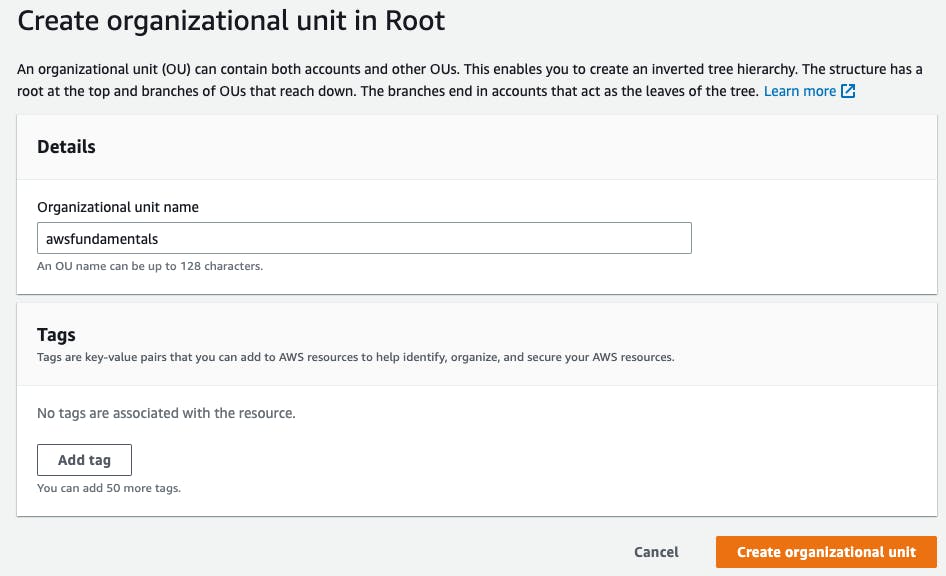
In the example, we're creating a new organizational unit named awsfundamentals so that we can later add a sandbox account for testing purposes while the awsfundamentals account will act as the production account.
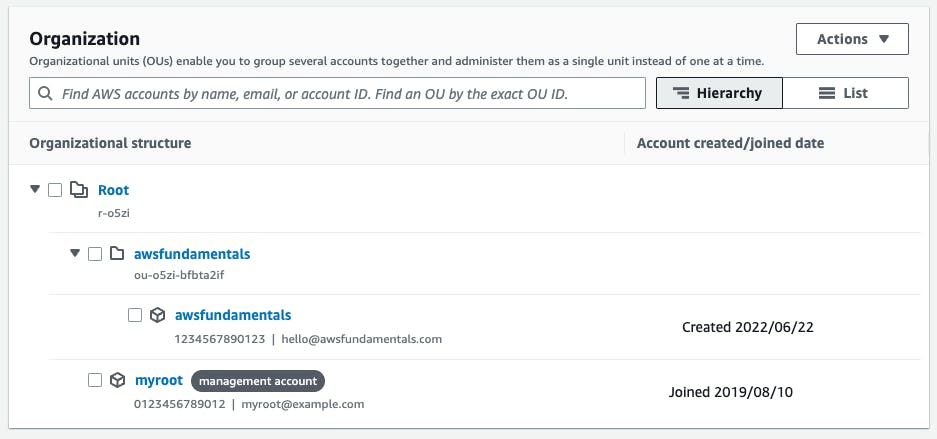
After we've created the unit, we can move our production account to our organizational unit by selecting the account and clicking Actions > Move.
Afterward, we can create the sandbox account. This account will also be moved to the new OU via the Actions > Move.
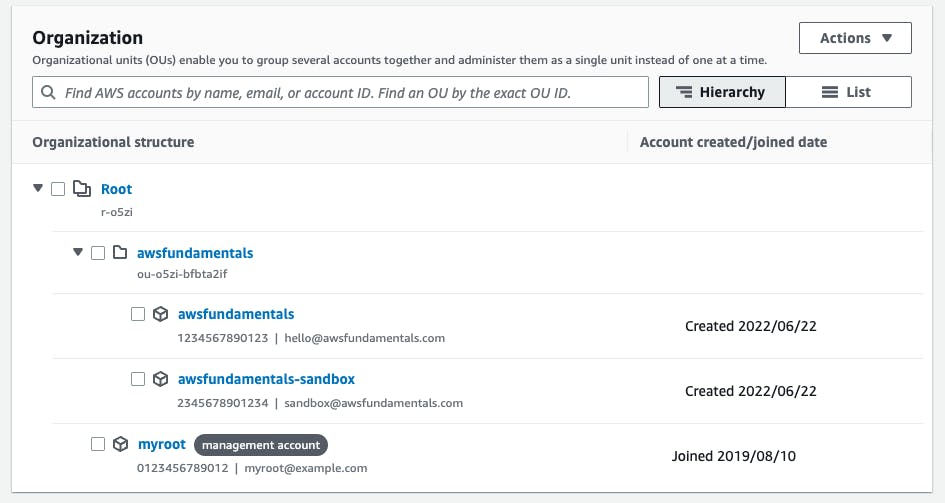
We now already have a small organizational structure that strictly separates environments and also clusters our first project.
We can now easily enforce account and organizational unit-wide rules via Service Control Policies in the next step.
Creating Service Control Policies
With Service Control Policies, we can apply rules throughout our organization. SCPs are essentially a set of rules that define what action can be taken in our AWS accounts.
For our example, we'll create an SCP that denies users from launching EC2 instances.
Select the
Policiestab on the lefthand navigation.Select
Service control policies. By default, SCPs are not enabled for your organization. By clickingEnable service control policieswe'll enable this feature. A green banner will appear after SCPs are successfully enabled.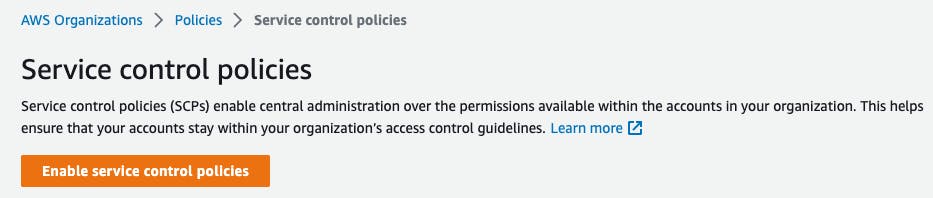
At first, there will be just one auto-created policy
FullAWSAccess. As with other IAM permissions, by default, all actions are denied. This first policy will grant all permissions.Let's create a new policy by clicking
Create policy. We'll add the nameDenyEC2and enter a fitting description.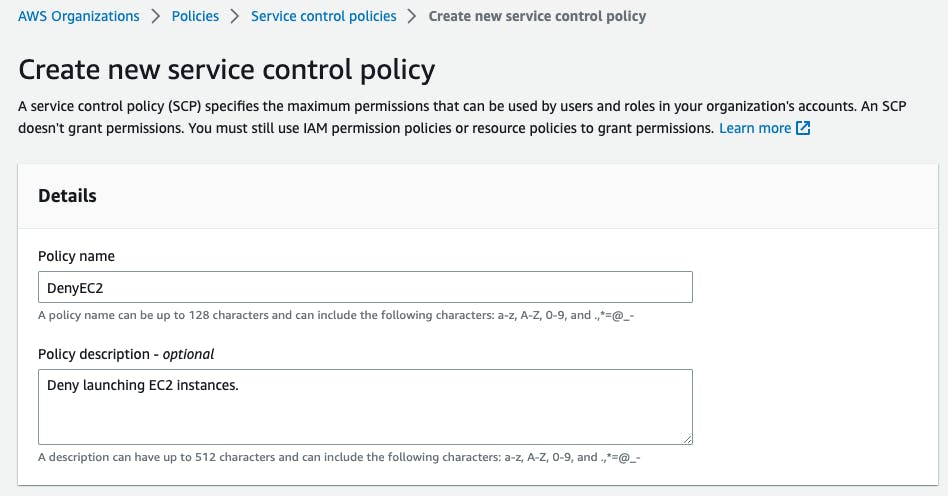
We can then scroll down to add our policy:
{
    "Version": "2012-10-17",
    "Statement": [
        {
            "Sid": "DenyEC2InstanceLaunch",
            "Effect": "Deny",
            "Action": [
                "ec2:RunInstances"
            ],
            "Resource": [
                "*"
            ]
        }
    ]
}
After clicking
Create policythe policy is already in place, but it's not applied to any organizational unit or account.Let's select our policy and click
Actions > Attach. Let's choose the organizational unit we created for our project to apply the policy to its two member accounts.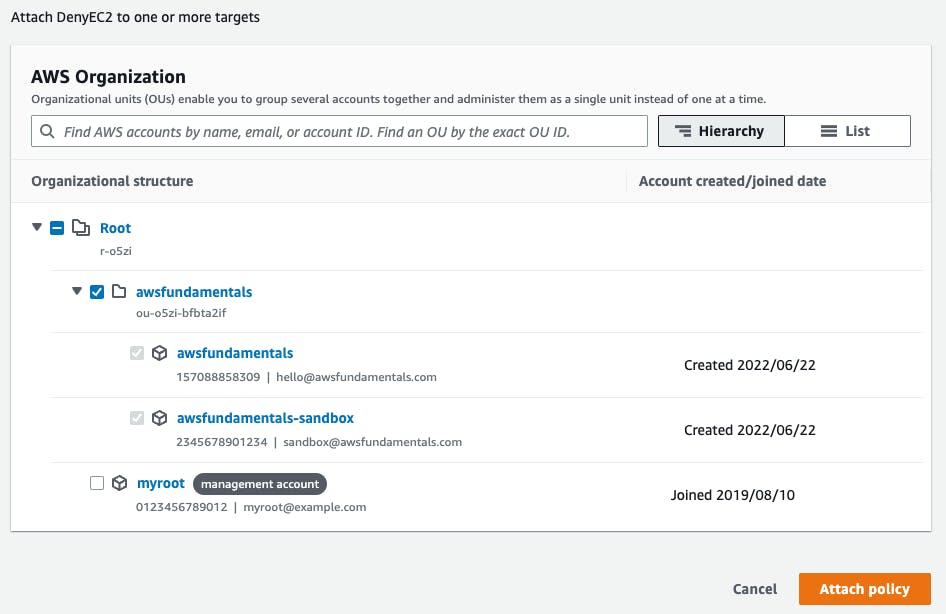
By clicking
Attach policywe're already done. The policy will now be active for both accounts. This will prevent the root and IAM users of our production and sandbox accounts from now on from launching EC2 instances.
It's simply not possible to remember all the different IAM actions even for the most used services. But gladly AWS lists all actions, resources, and condition keys for AWS services in their documentation.
Testing Restrictions
Let's test our restrictions by logging into one of our project's accounts. This can be either via the root user or via any IAM user.
Let's then jump to the EC2 management console and select Launch Instance in the overview. We can just leave all the details and use the standard configuration which is the Free Tier eligible t2.micro instance and disable the use of a key pair via Key pairs > Proceed without a key pair.
After clicking Launch instance we'll be prompted with the following error:
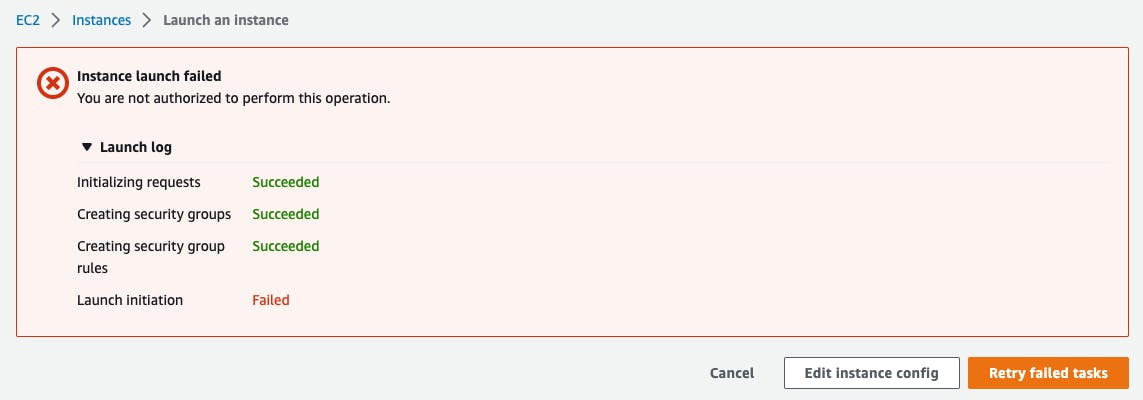
It's exactly what we expected as we're not allowed for ec2:RunInstance due to our custom-made service control policy.
Removing or Closing Accounts
At any time, you're able to remove existing member accounts of your organization.
Jump to the accounts overview page of the AWS Organizations management console.
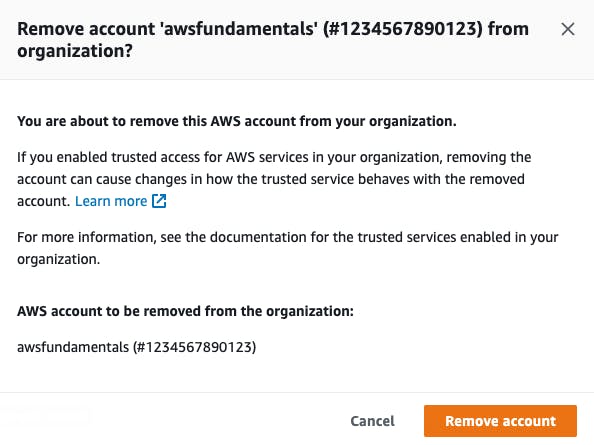
Select the desired account and
Actions > Remove from organization.Confirm the following modal to accept the removal of the account from your organization.
If you'd like to close the removed account entirely, you need to log into it with the root user, terminate all of its resources, and be sure that the payment information is up to date so that the last charges can be deducted from your credit card.
Afterward, you can go through the following steps to close your account:
Click on your account name on the top right and select
Accountto be taken to your accounts overview page.Scroll down to the bottom to find the
Close Accountsection. Select all checkboxes and confirm the deletion.
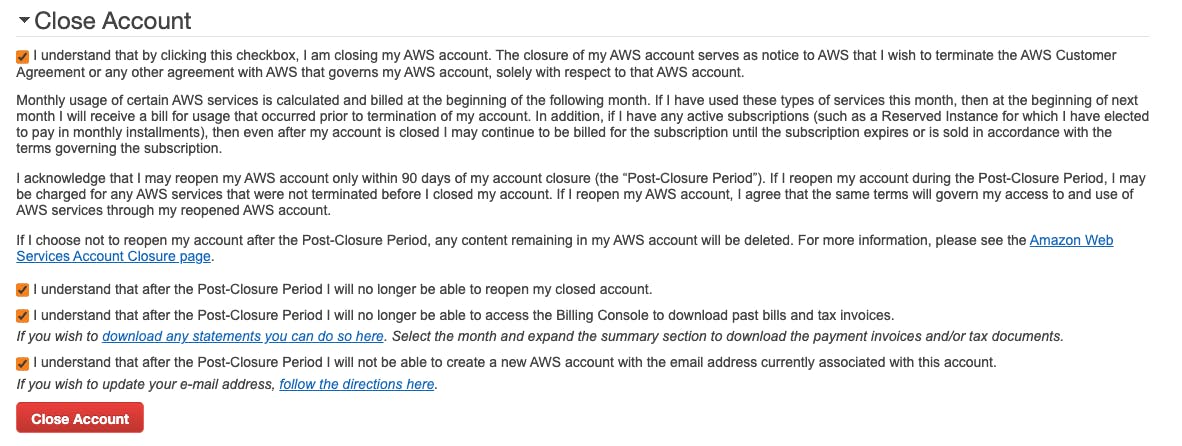
A few minutes after you'll receive a mail that confirms the account closure.
Within the first 90 days after you've closed your account you can still log in and contact AWS support. After that, anything remaining in your account will be permanently deleted, including not yet terminated service resources.
AWS Organization Best Practices
It's recommended to follow the best practices for operating an AWS organization. This includes security recommendations for both the management and member accounts as well as guides on how to structure and monitor your organization.
Management Account Best Practices
Everything rises and falls with the management account. See it as the heart of the organization as it's the owner with all possible permissions.
Use a Strong Password and Enable Multi-Factor Authentication (MFA) - the compromise of your management user (or any other AWS account root user) can have a significant impact on your financial resources. If you didn't do this yet, have a look at the dedicated guide we wrote to enable this for root and IAM users.
Used the Management Account Only for Tasks That Strictly Require the Management Account - don't use the management for daily operations. Generally, it's recommended to not create AWS resources in this account except for trails at CloudTrail which help you to keep track of actions within your AWS organization.
Keep Track of Who Accesses and Who's Able to Access the Management Account - regularly review who's able to access your management account as they know or have access to the email address, password, and MFA device. Also, ensure that there's a process to recover or reset access to your management account's root user.
Use a Non-Personal Email Address for the Management Account's Root User - if you're running a business, use a company email address instead of a public provider. It's also a good practice to forward any received emails of the root user to the personal email addresses of the responsible persons.
Don't follow short on any of the recommendations to keep your management account and with that your whole organization within AWS safe.
Member Account Security
Each of the best practices for the management account's root user also applies to any root user of member accounts.
Additionally, it's recommended to restrict what member account root users are allowed to do within the organization by creating an SCP.
{
    "Version": "2012-10-17",
    "Statement": [
        {
            "Effect": "Deny",
            "Action": "*",
            "Resource": "*",
            "Condition": {
                "StringLike": { "aws:PrincipalArn": "arn:aws:iam::*:root" }
            }
        }
    ]
}
This restricts root users from making AWS API calls. These should be done by AWS Identity and Access Management users of the member accounts (or users from the AWS Identity Center) via dedicated roles that do have enough permissions.
Monitoring your Organization
Enforcing security rules for your organization is important. As we're all humans and humans do make mistakes, it's also important to have proper monitoring within your organization to detect changes that are made to the organizational structure, e.g. creating new organizational units, inviting or removing accounts, or creating and applying service control policies.
A typical way of sending email notifications for any management events that are happing in the management account is a solution that features AWS CloudTrail, Amazon SNS, and Amazon EventBridge.
Enabling AWS CloudTrail - CloudTrail can log API activities within your account and all member accounts in your AWS organization. To enable it, go to the AWS CloudTrail management console in the
us-east-1region and create a new trail that captures management events. You'll need to select a name for the bucket that will receive the trails and a name for the KMS key that will be used for the encryption of the log messages.
We don't need to enable logging for the whole organization, as we only want to look for management events for AWS Organizations.
After clicking next, you'll be prompted to select the types of events you want to capture.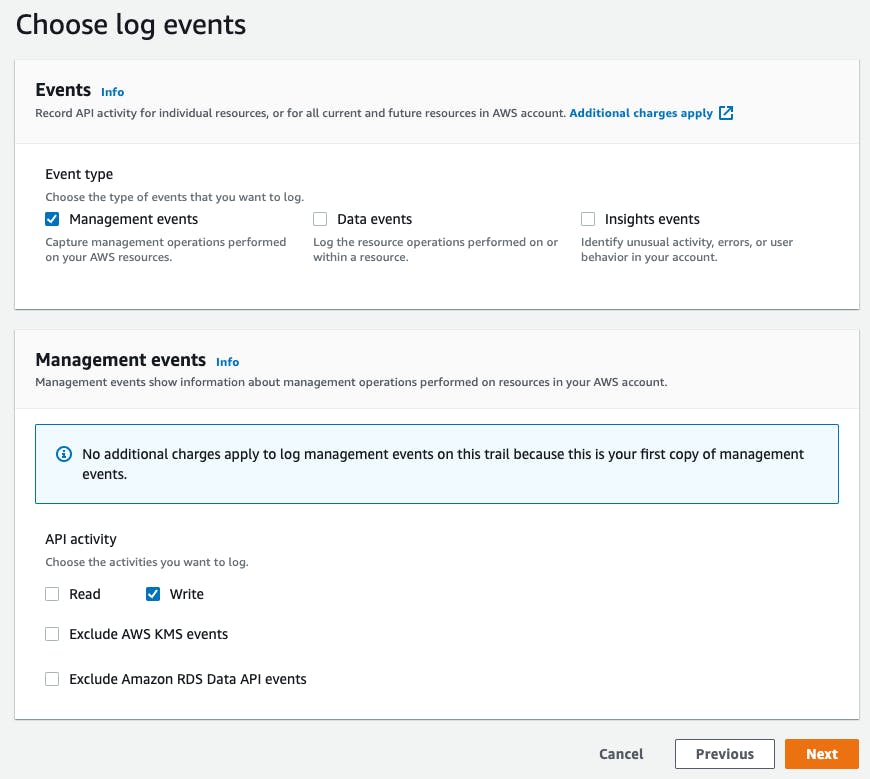
Select
Management eventsand the API activityWriteas we only want to track modifying changes. From now on, all management operations will be safely logged to S3.Creating a new SNS Topic - jump to the Simple Notification Service's management console and click on
Topics > Create Topic. We want to create a new topic with the standard type, so we can create email subscriptions.
After creating it successfully, we'll go toSubscriptions > Create subscriptionand selectEmailas the protocol. Enter your desired email and click on the confirmation link you'll receive shortly afterward clickingCreate subscription.Setting up the EventBridge Rule - finally, jump to your EventBridge rules to create a new rule. Enter a name and description and leave the selection
Rule with an event patternas is.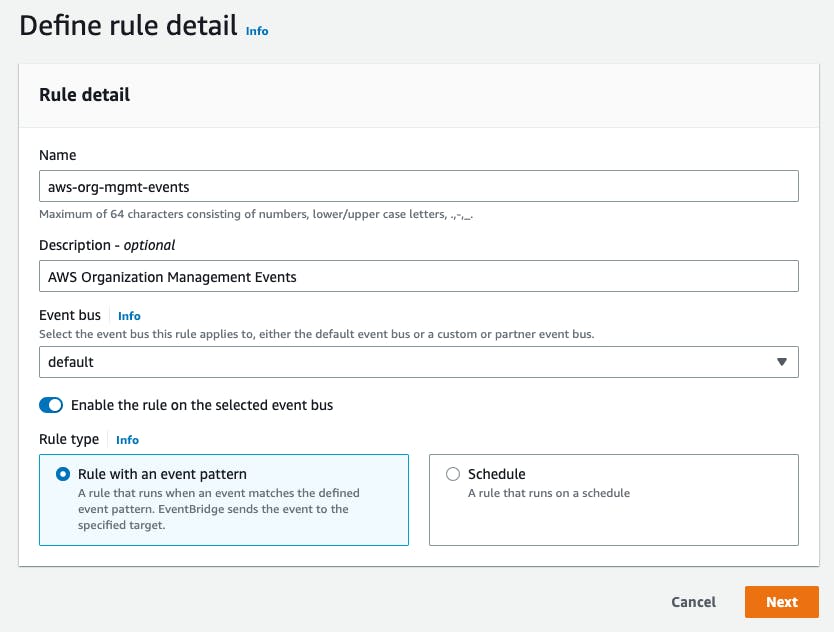
After clicking
Nextwe'll scroll down and selectCustom patternat theCreation methodsection so we can enter our own filter via JSON and put in{ "source": ["aws.organizations"] }. With this, we'll listen to all events from AWS Organizations.
In the next step, we'll select the targets that EventBridge will notify when it detects the AWS Organization events. We'll selectAWS serviceand search forSNS Topic.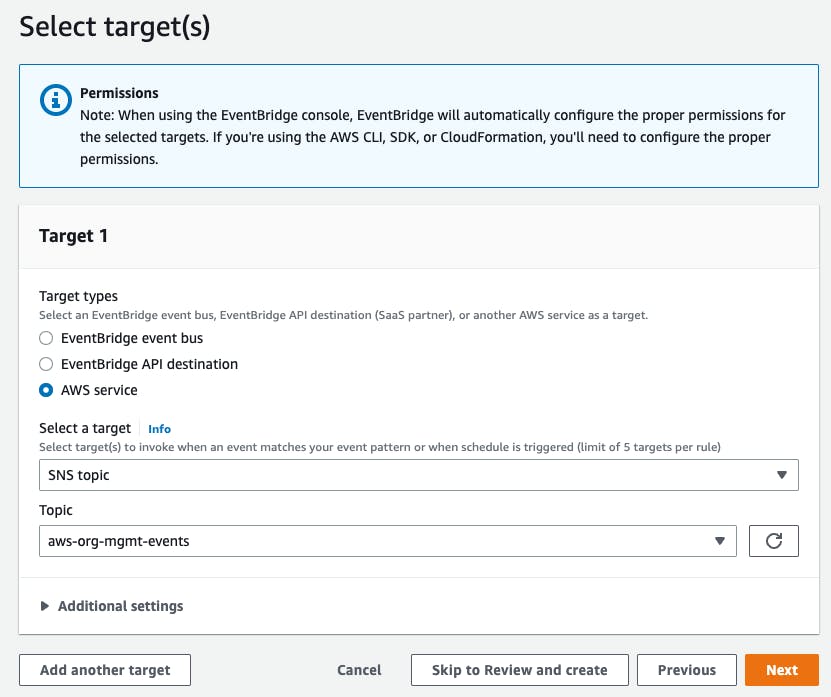
Our previously created topic will appear and after selecting it we can click
Nextand then finish the creation process.
We're all set and done. Let's jump to the AWS Organization management console and create a new test organizational unit to see that our monitoring is working as expected. Select the root OU and click Actions > Create new and finish the creation after entering a name.
Shortly after we should receive a mail with the event that's captured by EventBridge.

When we look into the message, we find the complete log event, which includes the operation CreateOrganizationalUnit as well as the response that was received.
{
  // [...]
  "source": "aws.organizations",
  "detail": {
    // [...]
    "eventTime": "2023-02-18T14:00:45Z",
    "eventSource": "organizations.amazonaws.com",
    "eventName": "CreateOrganizationalUnit",
    "responseElements": {
      "organizationalUnit": {
        "name": "test-unit",
        "id": "ou-o5zi-09z65zn1",
        "arn": "arn:aws:organizations::0123456789012:ou/o-ha75vpkg1a/ou-o5zi-09z65zn1"
      }
    }
  }
}
A detailed tutorial for this, also featuring Lambda, can be found in the AWS documentation.
Organization Structuring
A question that you may already have stumbled upon now only once: "How many AWS accounts should I have?"
There's no single answer and it not only depends on best practices but also preferences.
In the wild you'll find three main categories:
A single account for everything - The simplest and quickest option. Your application's production and every dev environment reside together with all other resources in a single account. IAM groups and roles are responsible for segregating access. This is a suitable solution for very small organizations or startups with limited resources and requirements.
Multiple accounts to separate application environments - This is a solution that's very common. It separates the workloads for one or multiple applications into their environments, generally into one for production and one-to-many for development environments.
Many accounts aligned to the organizational structure - equal to the previous point, but even more, separated. The final goal is to map the structure of the company with AWS accounts and organizational units. This includes the segregation of business units and workloads into different accounts and organizational units. It's a suitable solution for organizations with multiple teams or departments, especially if they require separate billing, security, or compliance requirements. With AWS Organizations, all the accounts can be managed in a central place via a tailor-made hierarchy.
There's no one correct answer, but option three is recommended to achieve a higher level of security and to easily fulfill different compliance rules.
Pricing
AWS Organizations come without extra charge. You'll still only pay for the resources that users and roles within all your member accounts use.
With consolidated billing, all applied service fees will be pushed up to your management account so that you have a full overview and control.
Conclusion
AWS Organizations is a powerful service that allows you to consolidate multiple AWS accounts into an organization that you can centrally manage and govern.
With AWS Organizations, you can create and manage accounts, invite users to those accounts, and apply policies across your organization.