AWS Identity and Access Management (IAM) is a service that enables you to manage fine-grained access to AWS services and resources securely. The basic principles of IAM rely on authentication (roles, users, groups) on the one hand, and authorization (policies) on the other.
In this article, we will cover the fundamentals of AWS IAM and dive deeper into the practical application of IAM Policies for recurring use cases. This includes the differentiation of roles and Policies, how to get them to work together, and finally, how to apply IAM Policies to empower your AWS resources.
AWS IAM Policies Infographic
Before delving into the details, take a moment to examine the infographic, which offers a concise summary of the most crucial information.
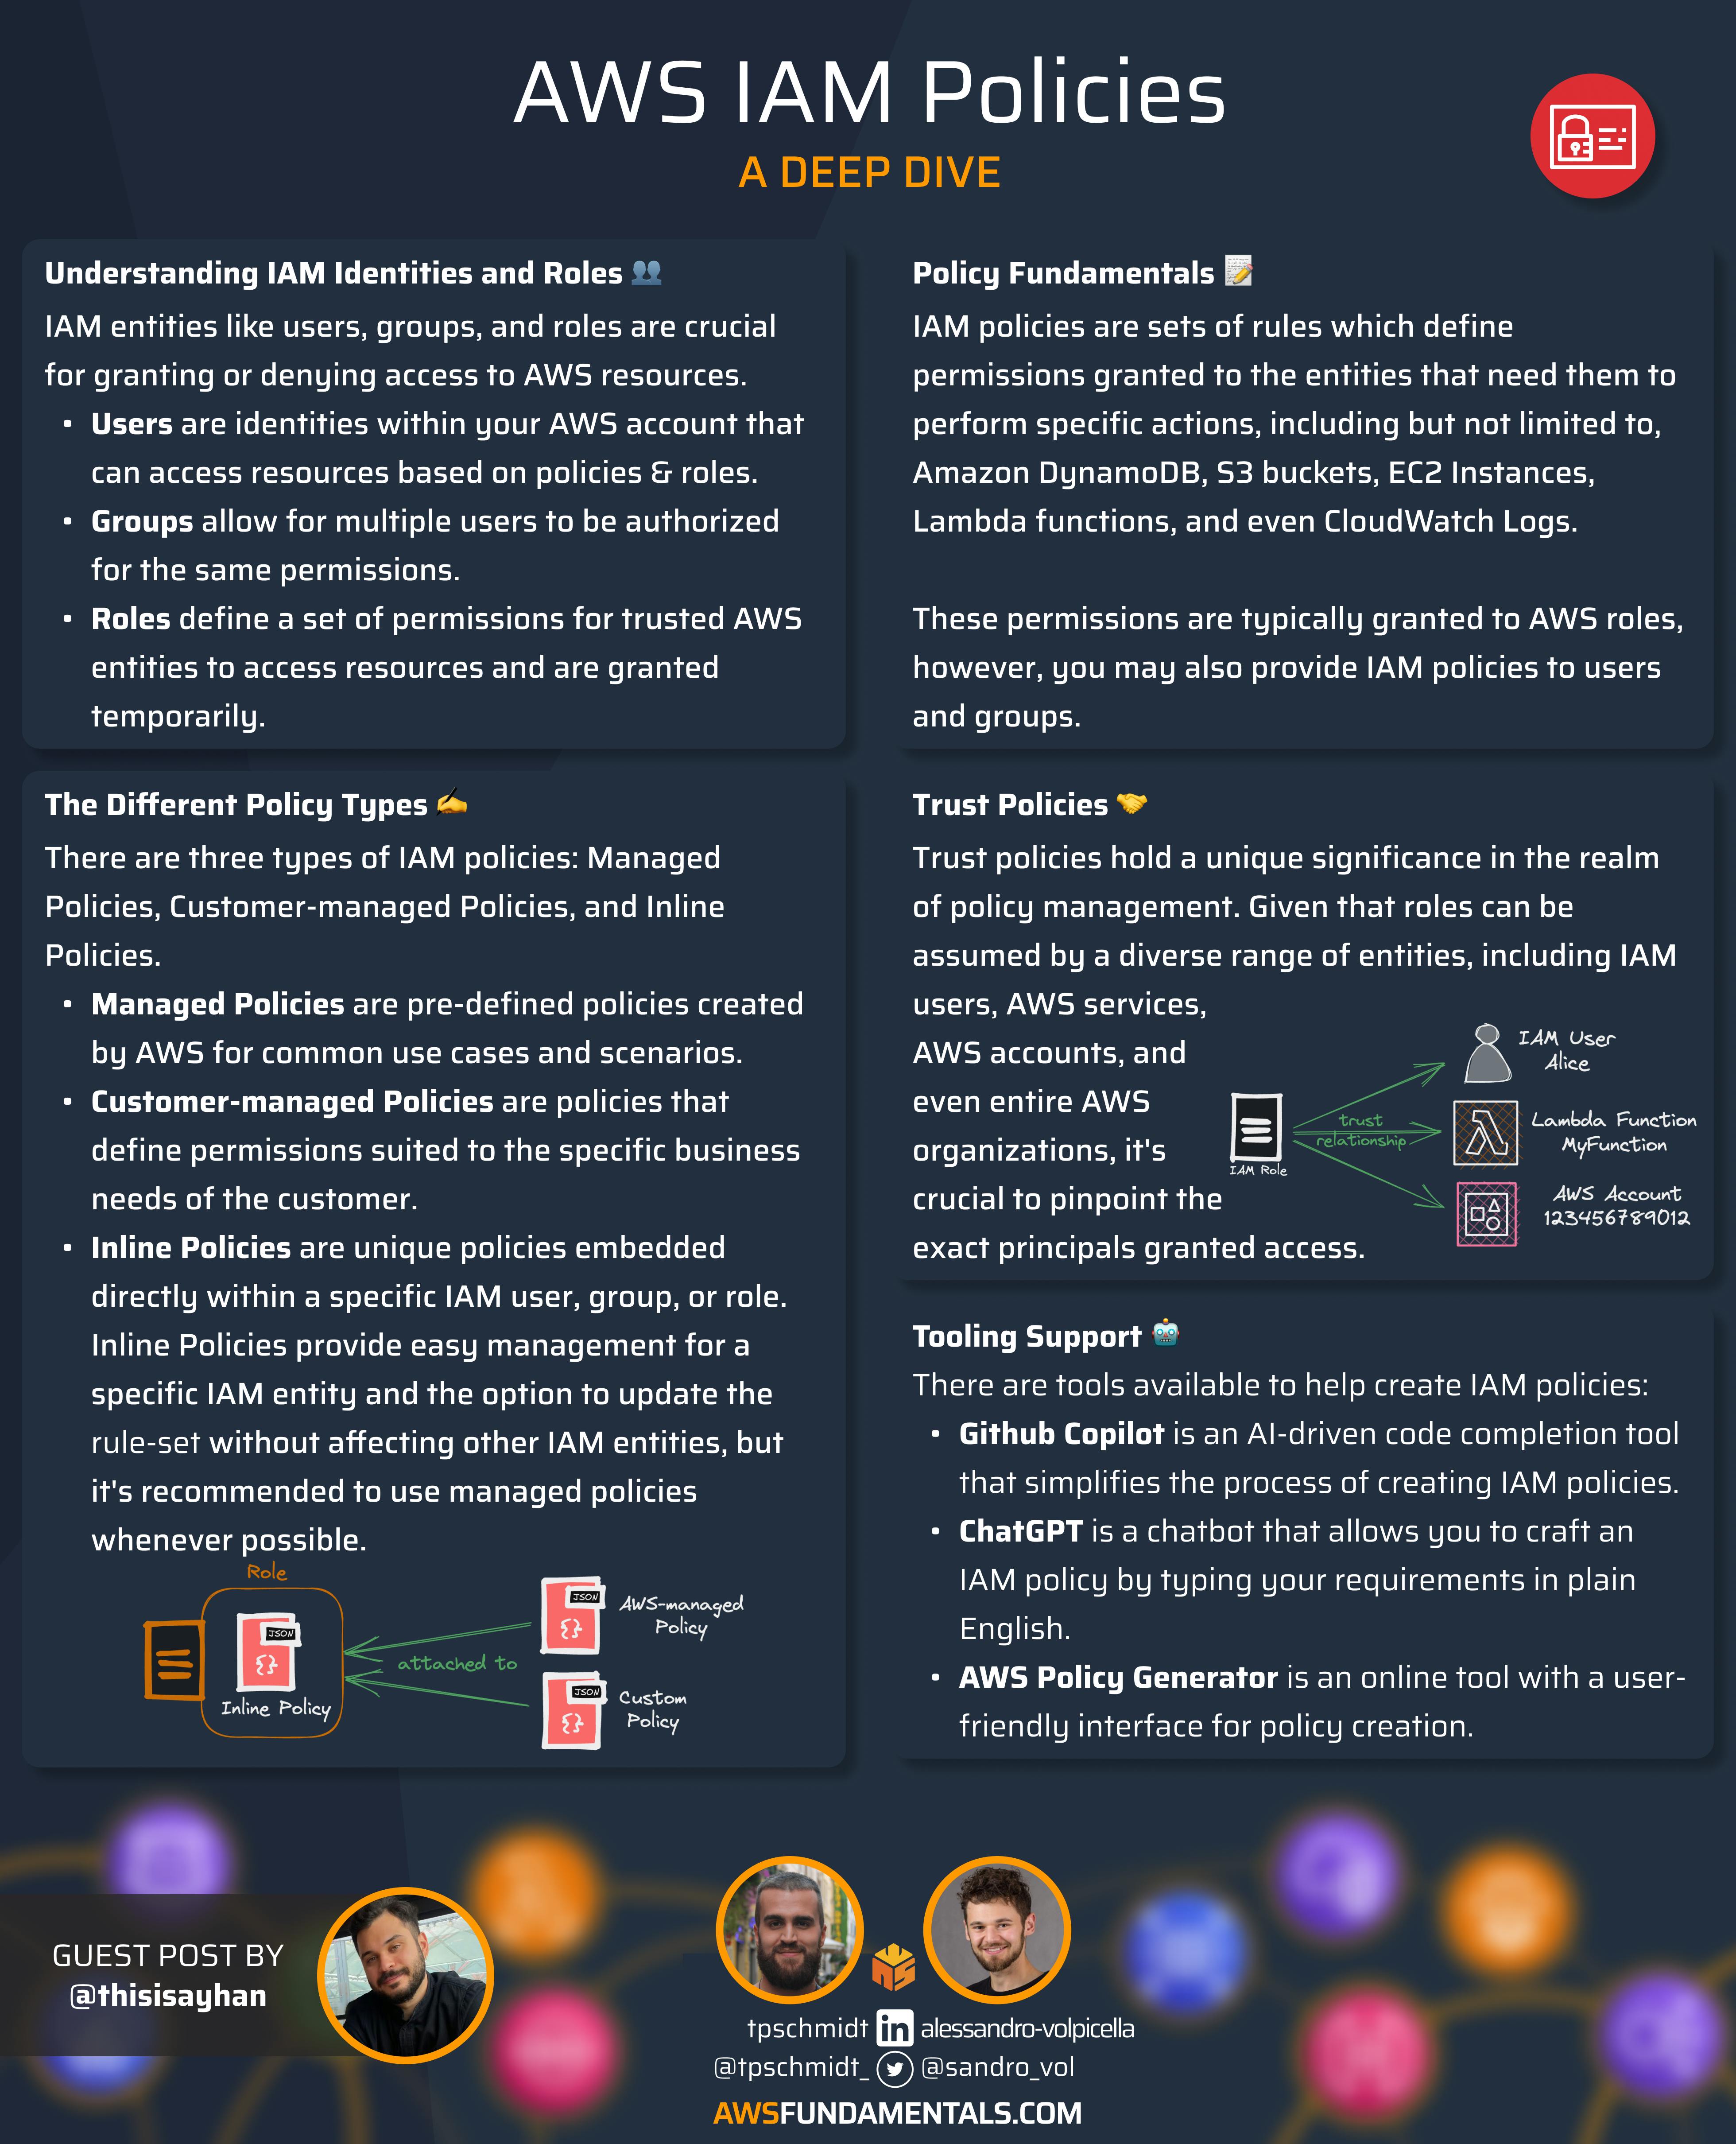
Understanding IAM Identities and Roles
Understanding Users, Groups, and Roles is crucial, as these are the entities to which we attach IAM policies to either grant or deny access to AWS resources.
Users and Groups
AWS IAM Users are identities that live inside your AWS account and can be granted permission to access AWS resources. Using their unique name and credentials, users may access resources to which they are authorized through IAM policies and roles that define the allowed or denied actions on those resources. IAM groups represent collections of users which come in handy when it comes to the authorization of multiple users for the same permissions using IAM policies. Typically, users and groups are assigned permissions based on the principle of least privilege, that is, new users and groups are created with no permissions by default but can be granted fine-grained permissions by assigning IAM policies for the actions, they need to perform mandatory tasks.
Authorization duration: Long-lived.
Authorization method: Long-term access keys.
Roles
An AWS IAM Role represents an entity that defines a set of permissions to determine what actions can be performed by a user or an AWS Service when accessing other resources. While this might sound pretty similar to users, roles are not coupled to specific individuals or groups, but rather are intended to be assumed by trusted AWS entities, which may include users and groups, too. For ensuring security, roles, unlike users, don't have standard long-term credentials (like passwords) associated with them but rather are granted temporarily and revoked automatically when the session expires.
Authorization duration: Temporary, usually one hour.
Authorization method: Security tokens provided by AWS Security Token Service.
Roles are among the most impressive and powerful features of AWS IAM. If you're interested in exploring all aspects of roles, check out our recent article on the matter for an in-depth analysis.
A Deep Dive into Policies
From what we have seen until this point, roles are short-term assumable collections of permissions and actions to AWS resources. These collections can be assumed by users or even groups to empower them in performing actions on resources in our AWS account. Safe and sound! But we are still missing that one piece of the puzzle which provides those roles with the permissions they need. This is where IAM policies come into play.
IAM policies are sets of rules which define permissions granted to the entities that need them to perform specific actions, including but not limited to, Amazon DynamoDB, S3 buckets, EC2 Instances, Lambda functions, and even Cloudwatch Logs. These permissions are typically granted to AWS roles, however, you may also provide IAM policies to users and groups.
Types of IAM Policies
There are three different types of IAM policies:
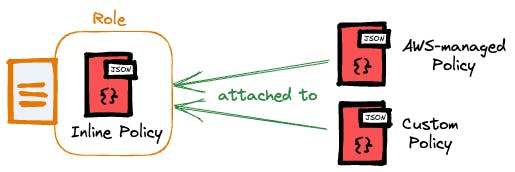
Managed Policies - Pre-defined policies created by AWS that cover common use cases and scenarios, such as full access to S3 buckets or read-only access to EC2 instances. Managed policies typically follow AWS best practices and provide a great starting point for quick bootstrapping solutions which don't deviate from the norm.
Customer-managed Policies - Alike AWS-managed policies, Customer-managed policies define a set of permissions for recurring scenarios, however, they are suited to the specific business needs of the customer. They can be formed from scratch or even use an AWS-managed policy as a foundation and add custom permissions or restrictions to it for matching the specific requirements of the customer's environment.
Inline Policies - Unique policies which are directly embedded within a specific IAM user, group, or role. Unlike managed policies, they are defined once for the particular IAM entity and will not be available for attachment to other IAM entities. Benefits comprise easy management of additional permissions for a specific IAM entity and the option to update the ruleset without having side effects for other IAM users, groups, and roles. On the other hand, excessive usage of inline policies could make the overall management of permissions more complex. It's recommended to use managed policies whenever possible and choose inline policies for more granular control.
Keep in mind: AWS-managed and customer-managed policies can be linked to roles, whereas inline policies are integrated within the user, group, or role.
Trust Policies
Trust policies hold a unique significance in the realm of policy management. Given that roles can be assumed by a diverse range of entities, including IAM users, AWS services, AWS accounts, and even entire AWS organizations, it's crucial to pinpoint the exact principals granted access.
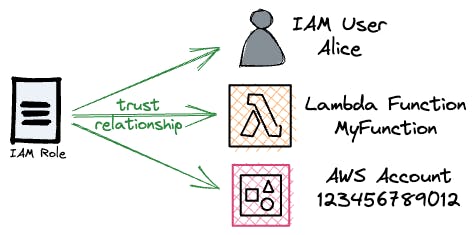
This is achieved by establishing a trust policy specifically tailored to the role in question.
Policy Structure
In the following, we see an example of an IAM policy:
{
  "Version": "2012-10-17",
  "Statement": [
    {
      "Sid": "S3ReadWrite",
      "Effect": "Allow",
      "Action": [
        "s3:GetObject",
        "s3:PutObject"
      ],
      "Resource": [
        "arn:aws:s3:::my-bucket/*"
      ]
    }
  ]
}
This policy can be attached to any AWS entity for granting access to and allowing retrieval and insertion of objects into a specific S3 bucket my-bucket.
IAM policies typically consist of the following elements:
Version Specified the version of the policy language. The newest version is 2012-10-17 . Older IAM policies may still have 2008-10-17 as version, however, it's recommended to use the latest version for new policies.
Statement The main element of the policy contains the statements to specify the permissions for granting or denying permissions. Each statement comprises the following elements:
Sid (optional) - An identifier that's often used to describe the effects of the policy.
Effect - Determines if the statement grants (
allow) or denies (deny) the defined actions.Action - Actions granted or denied by the statement, e.g. as demonstrated in the example above, retrieving S3 objects or adding new objects to S3 buckets. You can find the latest available actions on resources in AWS Service Authorization Reference.
Resource - The AWS resource(s) ARNs to which the policy applies. For granting or denying permissions to all resources, we may just provide
"*"to the resources, however, this is generally not recommended and is considered bad practice.Condition (optional) - Additional conditions must be met for the policy to take effect, such as AWS KMS encryption or some source IP address to name a few. We will discover more details on this later in this article.
Frequent Use Cases and Examples
We will cover some frequent use cases for IAM policies and a few more uncommon, but insightful examples of more complex scenarios in this section.
Inline Policy - Forwarding for Cloudwatch Log Streams
It is not uncommon for an enterprise to design a forwarder that puts Cloudwatch Logs into another third-party system, such as Splunk, NewRelic, or ElasticSearch. A Log Forwarder can be set up as an AWS Lambda function that requires access to all Cloudwatch LogStreams, utilizing an API key and secret to transmit them to third-party applications such as Splunk, NewRelic, or ElasticSearch.
{
    "Version": "2012-10-17",
    "Statement": [
        {
            "Sid": "LogStreamsAccessAll",
            "Effect": "Allow",
            "Action": [
                "logs:CreateLogStream",
                "logs:PutLogEvents",
                "logs:DescribeLogStreams"
            ],
            "Resource": [
                "*"
            ]
        },
        {
            "Sid": "SplunkCredentialsAccess",
            "Effect": "Allow",
            "Action": [
                "secretsmanager:GetSecretValue",
                "secretsmanager:DescribeSecret",
                "secretsmanager:GetResourcePolicy"
            ],
            "Resource": [
                "arn:aws:secretsmanager:<region>:<account-id>:secret:<third-party-api-key>"
            ]
        }
    ]
}
Here, we can see a perfectly valid use case for using the "*" for describing the applicable resources in the LogStreamsAccessAll statement. Remember: This should only be done if no fine granular access is possible or feasible. Most of the time, you will be able to keep the permission resources more strict as we can see in the statement SplunkCredentialsAccess.
Applying Inline Policies
Let's discover the options to apply this to our function.
Via the AWS Console
Navigate to your Lambda function and click on the "Configuration" tab
Select "Permissions" at the Sidemenu to find your Lambda function role in the "Execution role". Click it to open the management view for this role in the IAM console.

In "Permissions" click "Add permissions" > "Create inline policy"

Choose "JSON" to paste your already defined inline policy in the editor.
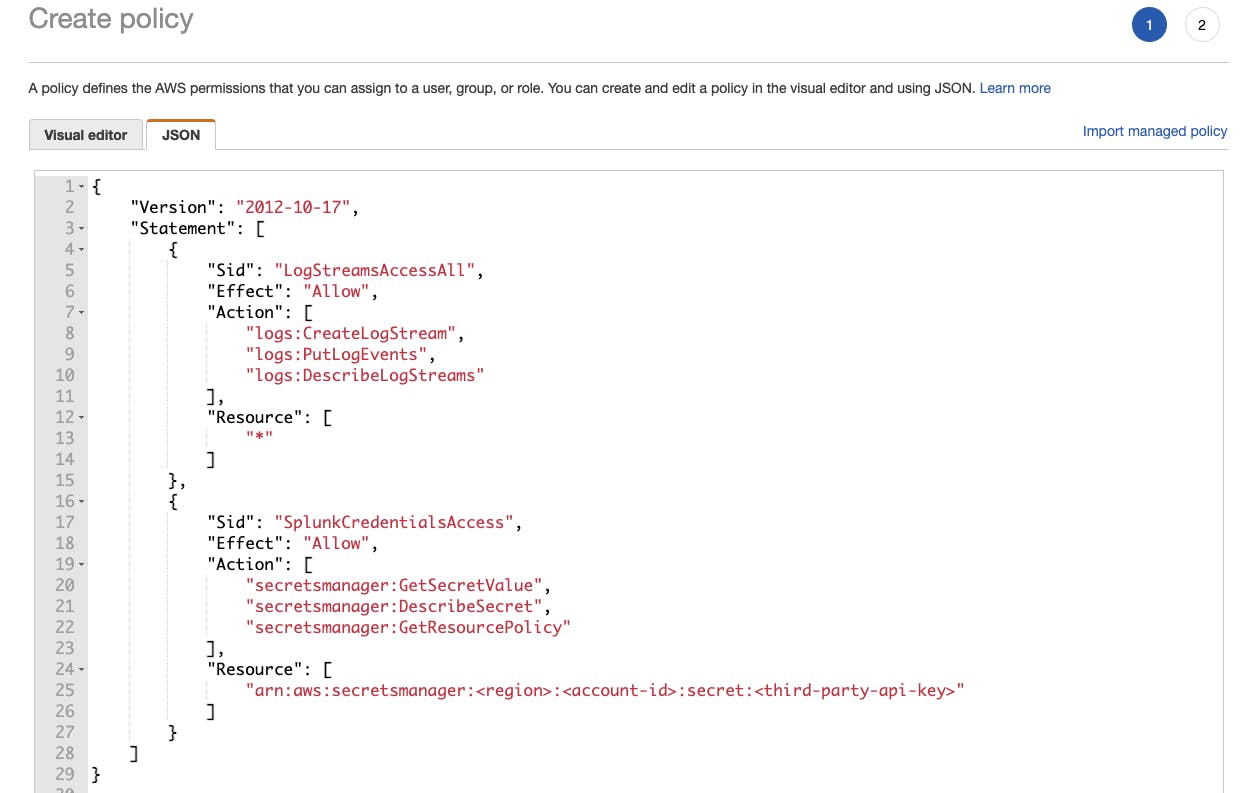
You can review your policy and finally create it. In the review stage, a clean overview will be provided which lists the actual actions that will take place when applying this inline policy. This is particularly beneficial when handling more complex, long statements which might be overwhelming to oversee in vanilla JSON documents.

With Infrastructure-as-Code: Terraform
We can also use Terraform to utilize Infrastructure as Code (IaC) to automate these steps with declarative models of our services.
Let's say we have our Lambda function defined as follows
resource "aws_lambda_function" "log_forwarder" {
    function_name    = "log-forwarder"
    role             = aws_iam_role.forwarder.arn // <--- OUR ROLE
    runtime          = "nodejs16.x"
    handler          = "log-forwarder.handler"
    (...)
}
We have our role forwarder attached to this function. Now we need to attach our inline policy to this role.
resource "aws_iam_role" "forwarder" {
  name               = "log-forwarder-role"
  assume_role_policy = data.aws_iam_policy_document.forwarder_assume.json
}

data "aws_iam_policy_document" "forwarder_assume" {
  statement {
      effect  = "Allow"
      actions = ["sts:AssumeRole"]

      principals {
          type        = "Service"
          identifiers = ["lambda.amazonaws.com"]
      }
  }
}

resource "aws_iam_role_policy" "forwarder_inline_policy" {
  name = "forwarder_inline_policy"
  role = aws_iam_role.forwarder.id

  policy = jsonencode({
    Version = "2012-10-17"
    Statement = [
      {
        Sid = "LogStreamsAccessAll"
        Effect = "Allow"
        Action = [
          "logs:CreateLogStream",
          "logs:PutLogEvents",
          "logs:DescribeLogStreams"
        ]
        Resource = ["*"]
      },
      {
        Sid = "SplunkCredentialsAccess"
        Effect = "Allow"
        Action = [
          "secretsmanager:GetSecretValue",
          "secretsmanager:DescribeSecret",
          "secretsmanager:GetResourcePolicy"
        ]
        Resource = [
          "arn:aws:secretsmanager:<region>:<account-id>:secret:<third-party-api-key>"
        ]
      }
    ]
  })
}
This will ensure to have the inline policy attached to our Lambda function when applying the infrastructure via Terraform.
Applying Customer-managed Policies
Creating a Customer-managed policy for this example is almost as simple as attaching it as an inline policy to this very specific resource. Let's start with the GUI again.
Via the AWS Console
Repeat the first three steps from the inline policy example, but select "Attach policies" this time

A list of existing AWS-managed and Customer-managed policies will be displayed. We haven't created our Customer-managed policy for this use case yet. So we click "Create policy"

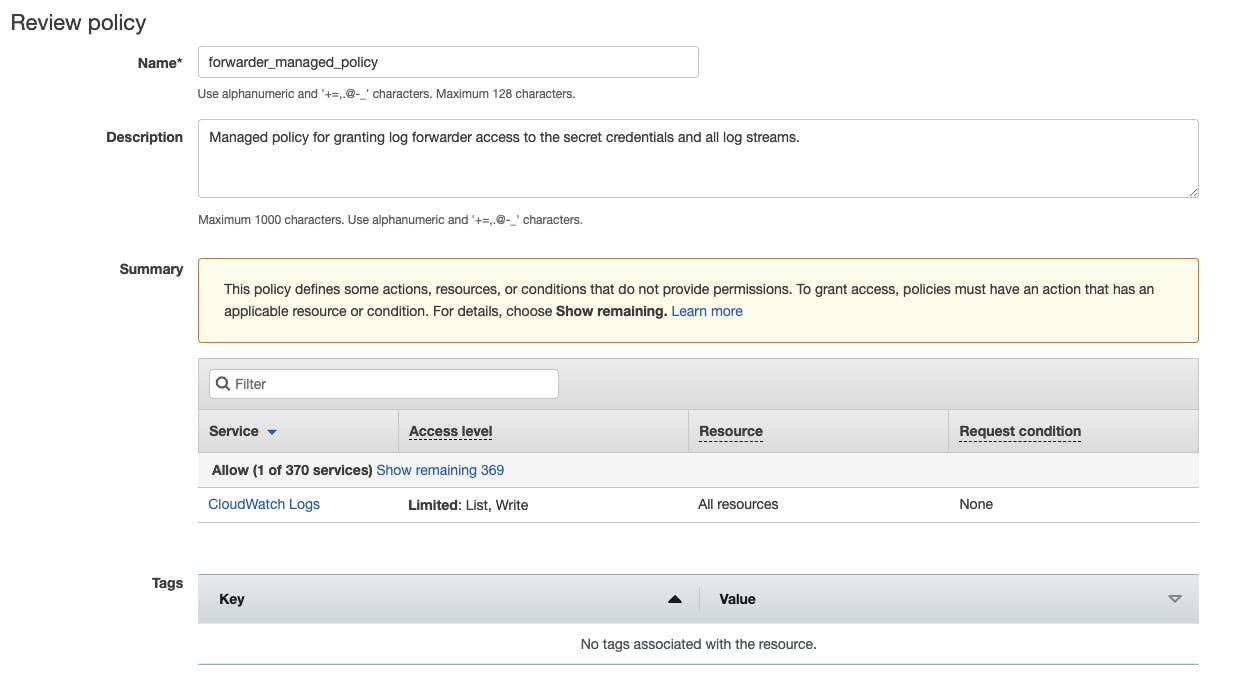
After pasting the JSON document just as in the inline policy example, we will get the Review again. This time, we need to give our policy a Name and may add a description for better visibility.
With Infrastructure-as-Code: Terraform
Using Terraform, we can create an aws_iam_policy by providing an aws_iam_policy_document with the statements of our policy. Finally, this aws_iam_policy will be attached to our role via an aws_iam_role_policy_attachment resource. The following snippet will provide the full working IAM resources for our Terraform declarations
resource "aws_iam_role" "forwarder" {
  name               = "log-forwarder-role"
  assume_role_policy = data.aws_iam_policy_document.forwarder_assume.json
}

data "aws_iam_policy_document" "forwarder_assume" {
  statement {
      effect  = "Allow"
      actions = ["sts:AssumeRole"]

      principals {
          type        = "Service"
          identifiers = ["lambda.amazonaws.com"]
      }
  }
}

resource "aws_iam_role_policy_attachment" "forwarder" {
  policy_arn = aws_iam_policy.forwarder.arn
  role       = aws_iam_role.forwarder.name
}

resource "aws_iam_policy" "forwarder" {
  name   = "forwarder_managed_policy"
  policy = data.aws_iam_policy_document.forwarder.json
}

data "aws_iam_policy_document" "forwarder" {
  statement {
    sid = "LogStreamsAccessAll"
    effect = "Allow"
    actions = [
      "logs:CreateLogStream",
      "logs:PutLogEvents",
      "logs:DescribeLogStreams",
    ]
    resources = ["*"]
  }

  statement {
    sid = "SplunkCredentialsAccess"
    effect = "Allow"
    actions = [
      "secretsmanager:GetSecretValue",
      "secretsmanager:DescribeSecret",
      "secretsmanager:GetResourcePolicy",
    ]
    resources = [
      "arn:aws:secretsmanager:<region>:<account-id>:secret:<third-party-api-key>",
    ]
  }
}
Applying AWS-managed Policies
We could also combine AWS-managed policies with inline policies to reach the same effect. Here, we will use the CloudWatchLogsFullAccess policy and attach it directly to our role such that we only need to define the Secretsmanager access permissions to our Lambda function role as an inline policy. (Note that this managed policy has more permissions than what we have defined before in our custom policy but it makes a good example for this tutorial)
resource "aws_iam_role" "forwarder" {
  name               = "log-forwarder-role"
  assume_role_policy = data.aws_iam_policy_document.forwarder_assume.json
}

data "aws_iam_policy_document" "forwarder_assume" {
  statement {
      effect  = "Allow"
      actions = ["sts:AssumeRole"]

      principals {
          type        = "Service"
          identifiers = ["lambda.amazonaws.com"]
      }
  }
}

resource "aws_iam_role_policy_attachment" "cloudwatch_full_access" {
  policy_arn = "arn:aws:iam::aws:policy/CloudWatchLogsFullAccess"
  role       = aws_iam_role.forwarder.name
}

resource "aws_iam_role_policy" "forwarder_inline_policy" {
  name = "forwarder_inline_policy"
  role = aws_iam_role.forwarder.id

  policy = jsonencode({
    Version = "2012-10-17"
    Statement = [
      {
        Sid = "SplunkCredentialsAccess"
        Effect = "Allow"
        Action = [
          "secretsmanager:GetSecretValue",
          "secretsmanager:DescribeSecret",
          "secretsmanager:GetResourcePolicy"
        ]
        Resource = [
          "arn:aws:secretsmanager:<region>:<account-id>:secret:<third-party-api-key>"
        ]
      }
    ]
  })
}
As we can see, this is much cleaner than before.
When using the AWS Console, we can simply go through the first three steps from the inline policy again and choose "Attach policy" to get the list of existing AWS-managed and Customer-managed policies from which we can pick whatever is most suitable for our use case.
Creating IAM Policies
IAM policies can be quite error-prone. Fortunately, various tools are available to help you create your IAM policies with greater ease.
Github Copilot
GitHub Copilot is an AI-driven code completion tool that simplifies the process of creating IAM policies. It's usable as an integration for popular IDEs like VSCode or IntelliJIDEA.

To create IAM policies, you can either:
Leveraging code suggestions - starting with a new resource type and giving it a detailed name.
Descriptive comments - writing a comment in which we'll include our intentions for the policy.
ChatGPT
ChatGPT is a chatbot designed for every task possible. To craft an IAM policy using ChatGPT, simply start typing your policy requirements in plain English. Feel free to be as detailed and specific as necessary.

ChatGPT will also remember your previous inputs and results, allowing you to easily refine the outcomes in subsequent prompts for improved results.
AWS Policy Generator
The AWS Policy Generator is an online tool designed for crafting IAM policies. To create an IAM policy with this generator, simply launch the tool and specify the policy type you're looking for. The generator will then present a user-friendly interface for policy creation. From here, you can choose the actions and resources the policy should permit or restrict, and the tool will conveniently generate the policy for you.
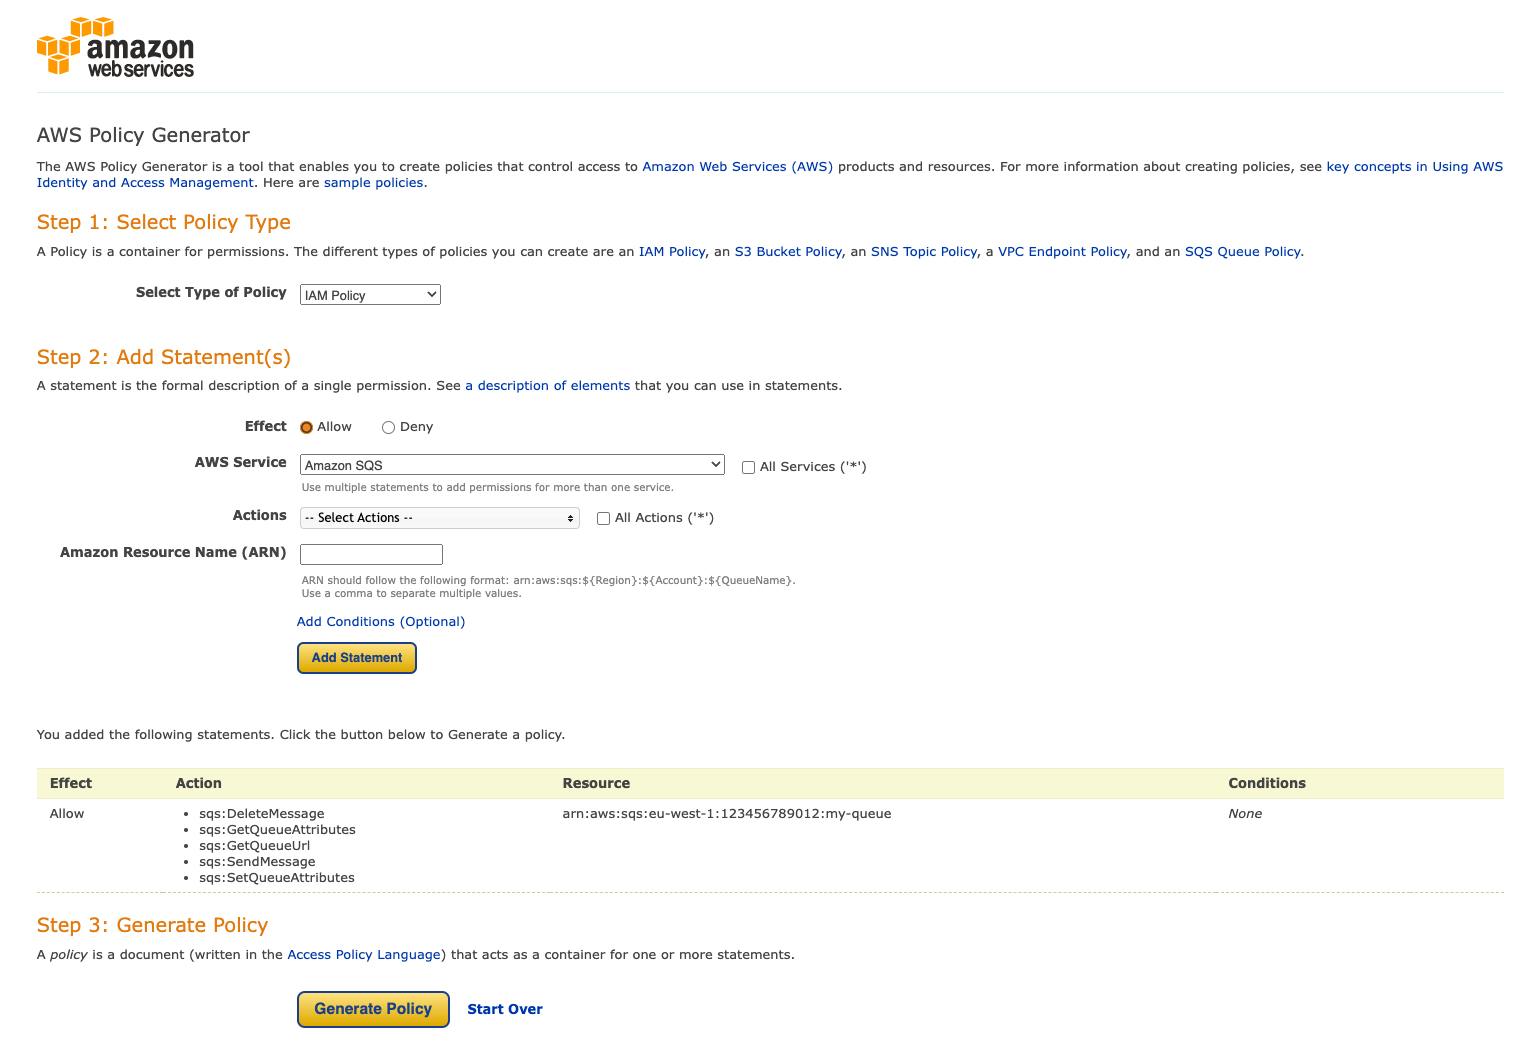
If you'd like to dive deeper into all three tools and how to use them for IAM policy generation, check out our article comparing Github Copilot, ChatGPT, and AWS Policy Generator.
Conclusion
IAM policies are vital to any solution that is built upon AWS-managed services. We can use AWS-managed policies for very common use cases that align with AWS best practices. If there is any set of permissions or denials business-specific or tightly coupled to the requirements of your custom environment, creating Customer-managed policies and attaching them to all roles, users, and groups that need them to perform their required tasks is the way to go. Finally, if any grants or denials need to be defined for one specific entity, we can solve this without creating managed policies that are only used by one resource but attaching inline policies for this particular entity, as well.
Are you interested in more?
Head over to our bi-weekly newsletter or check out the following blog posts

